

The key to avoiding altitude sickness in Banff isn’t just about drinking water; it’s about having a smart logistical plan from the moment you land.
- Start your ski days at Lake Louise’s lower elevation before tackling the higher terrain of Sunshine Village.
- Implement a strict “après-ski protocol” by prioritizing hydration and delaying alcohol for the first 48 hours.
Recommendation: Fly into Calgary (YYC) and spend your first night there. This simple logistical choice provides a gentler start to your high-altitude adventure and dramatically reduces your risk.
The thrill is palpable. You’ve just landed in Alberta, ready to carve the legendary powder of Banff’s Ski Big 3. The promise of vast bowls, perfectly groomed runs, and stunning Rocky Mountain scenery is within reach. But for international skiers flying in from Europe or the US, a hidden threat lurks at 4,500 feet and above: acute mountain sickness (AMS), or altitude sickness. It’s the one thing that can turn the trip of a lifetime into a miserable experience of headaches, nausea, and fatigue, completely wasting your valuable lift ticket.
Of course, you’ll hear the standard advice to “drink plenty of water” and “take it easy.” While true, this isn’t a strategy. For a value-conscious skier on a tight schedule, you need a concrete, logistical plan that works from the moment you step off the plane. Wasting a precious ski day feeling unwell is not an option. The common mistake is treating acclimatization as a passive process, when it should be an active part of your vacation planning.
This guide reframes the entire problem. We’re moving beyond generic health tips to build a strategic, day-by-day “Acclimatization Itinerary.” We will treat your choice of resort, your rental gear, your transportation, and even your après-ski plans as powerful tools to help your body adjust. This is about making smart, logistical decisions that maximize your time on the snow and minimize your risk of illness. By the end, you’ll have a clear, actionable playbook to ensure you feel fantastic from your first run to your last.
In this comprehensive guide, we will break down the essential logistical components for a successful high-altitude ski trip. You’ll discover a clear plan of attack, from choosing the right resort for your first day to understanding which rental gear can save you precious energy, and even how to enjoy Banff’s vibrant social scene without compromising your well-being.
Summary: Your Strategic Itinerary for a High-Altitude Banff Vacation
- Lake Louise vs Sunshine Village: Which Resort Suits Intermediate Skiers?
- High Performance vs Standard: Is Upgrading Your Rental Skis Worth It?
- Free Ski Shuttles: How to Get from Hotel to Hill Without Driving?
- Nachos and Beer: Where is the Best Apres-Ski Atmosphere in Banff?
- Skiing at -30°C: How to Keep Your Feet Warm All Day?
- How to Embrace -20°C: The Secret to Enjoying Edmonton’s Winter Patios?
- Are You Safe from Avalanches on Marked Winter Trails in November?
- November or April: Which “Dead Season” Actually Offers Cheap Hotels?
Lake Louise vs Sunshine Village: Which Resort Suits Intermediate Skiers?
For skiers flying directly into the Rockies, your first decision on the ground is the most critical part of your acclimatization strategy: where to ski on Day 1. While both Lake Louise and Sunshine Village offer incredible terrain for intermediates, they are not created equal when it comes to altitude. This is where an “Elevation Strategy” becomes your best defence against AMS. The key is to start low and work your way up. Recent data shows that the base of Sunshine Village sits at 2,160m, a full 514 meters (1,686 feet) higher than Lake Louise’s base of 1,646m. Starting your trip at Sunshine is like jumping into the deep end of the pool before you’ve learned to swim.
The logistical imperative is clear: ski Lake Louise on your first day. Its lower base elevation provides a gentler introduction for your body. This doesn’t mean sacrificing quality. Lake Louise boasts a massive 45% of its terrain designated for intermediates, including miles of thigh-burning cruisers on the front face and in the beautiful Larch area. You can spend a full, thrilling day exploring without pushing your body to its absolute elevation limit. Think of it as a strategic training day that allows you to enjoy world-class skiing while your body quietly adapts.
Once you’ve had a successful first day and a good night’s rest in Banff town, your body will be far better prepared to handle the higher alpine environment of Sunshine Village. With its incredible 55% intermediate terrain, including sweeping blue runs and unique ungroomed trails, Sunshine is the perfect reward for your patient, strategic approach. This simple, two-day progression is the cornerstone of a successful acclimatization itinerary.
Your 5-Step Acclimatization Itinerary Checklist
- Initial Landing: If possible, spend your first night in Calgary (lower elevation) before driving to Banff.
- Day 1 Plan: Dedicate your first ski day exclusively to Lake Louise to take advantage of its lower base elevation.
- Day 2+ Progression: After 24-48 hours of adjustment, tackle the higher altitudes of Sunshine Village.
- Hydration Discipline: Consume at least 3-4 litres of water per day, starting on the plane. Carry a water bottle or hydration pack.
- Symptom Check: Before heading out each morning, honestly assess for any signs of AMS (headache, dizziness, nausea). Do not ski if symptoms are present.
By treating your resort choice as a medical and logistical tool, you set yourself up for a week of fantastic skiing, not a week of recovery.
High Performance vs Standard: Is Upgrading Your Rental Skis Worth It?
When you’re fighting for every oxygen molecule at 8,000 feet, energy conservation becomes paramount. This is where your equipment choice moves from a matter of preference to a key component of your acclimatization strategy. The concept is simple: better gear reduces physical exertion. This “Effort Economy” is why upgrading from standard rental skis to a high-performance model is one of the smartest investments you can make on a Banff ski trip. It’s not about looking like a pro; it’s about making your day significantly easier on a body that’s already working overtime.
Standard rental skis are typically softer and less technologically advanced. On the hard-packed or variable snow common in the Rockies, they require more muscle and effort to hold an edge and initiate turns. High-performance skis, by contrast, are stiffer, have better torsional rigidity, and feature advanced sidecuts. This means they grip ice with confidence, power through choppy snow smoothly, and turn with minimal input. The result? You expend far less energy on every single run, all day long. This saved energy is then available for your body’s most important task: acclimatizing to the altitude.
The difference is not just theoretical; it’s quantifiable. Less fatigue means your heart rate stays lower, your breathing is less laboured, and you’re less likely to feel the compounding effects of physical exertion and low oxygen. When you’re trying to maximize the value of your lift ticket, being able to ski from first chair to last without hitting a wall of exhaustion is a massive advantage. The slight increase in daily rental cost pays for itself in stamina, enjoyment, and a reduced risk of altitude-related symptoms.
This comparative analysis highlights how a small upgrade in equipment directly translates to better energy management at altitude, a crucial factor for skiers arriving from sea level.
| Rental Category | Daily Cost (CAD) | Best For | Energy Conservation |
|---|---|---|---|
| Standard/Sport | $60-75 | Casual cruising, beginners | More effort required on hard pack |
| High Performance | $85-95 | All-day skiing, variable conditions | 30% less effort on firm snow |
| Demo/Premium | $100-120 | Advanced skiers, powder days | Optimal efficiency at altitude |
So, is the upgrade worth it? From a logistical and physiological standpoint, absolutely. Consider it a small price to pay for more energy, more ski time, and a healthier, happier vacation.
Free Ski Shuttles: How to Get from Hotel to Hill Without Driving?
A successful acclimatization plan is about minimizing all forms of stress on your body, not just the physical stress of skiing. This is why leveraging Banff’s excellent free ski shuttle system is a non-negotiable part of your logistical strategy. Opting out of driving is not just about convenience; it’s about actively removing potential stressors that can hinder your body’s ability to adapt to the altitude. Think about it: navigating unfamiliar snowy roads, searching for parking at a busy resort, and the general anxiety of driving in a foreign environment all contribute to mental and physical fatigue.
The Ski Big 3 resorts have this figured out. Regular, complimentary shuttle buses run from numerous stops throughout the town of Banff directly to the base of Lake Louise, Sunshine Village, and Mt. Norquay. This service is designed to make your life as a visiting skier seamless. You can relax, enjoy the stunning mountain scenery on the way to the hill, and save your energy for the slopes. There is zero benefit to adding the stress of driving to your day, especially during the critical first 48 hours of acclimatization.
Furthermore, the town of Banff itself is built for pedestrians. Most hotels are within a 15-minute walk of the downtown core, where you’ll find restaurants, shops, and shuttle stops. For times when you don’t feel like walking, the local ROAM public transit system provides a reliable and efficient backup, connecting all parts of town and linking directly to the main ski shuttle hubs. This integrated network means a rental car is a completely unnecessary expense and, more importantly, an unnecessary source of stress. Embrace the local infrastructure; it’s designed to help you relax and enjoy your vacation.
By letting someone else handle the driving, you are making a conscious choice to conserve your physical and mental resources, allowing your body to focus on the all-important task of adjusting to the high-altitude environment.
Nachos and Beer: Where is the Best Apres-Ski Atmosphere in Banff?
The image is iconic: finishing a stellar day on the slopes and heading straight for a patio to celebrate with a plate of nachos and a cold beer. In Banff, this is a rite of passage. However, for the newly arrived international skier, this ritual carries a significant risk. During the first 48 hours of your trip, your body is in a delicate state of acclimatization, and nothing derails that process faster than alcohol. This is where a strict “Après-Ski Protocol” becomes essential. The good news is you don’t have to skip the fun, you just have to be smart about it.
The science is clear and the advice from official sources is direct. According to MyHealth Alberta, the province’s own health authority, a key step to prevent altitude sickness is to “drink plenty of water, but do not drink alcohol.” At altitude, alcohol’s effects are magnified. It is a diuretic that accelerates dehydration, and it can suppress your respiratory system, slowing down the natural acclimatization process. Even one or two beers can have a surprisingly potent effect, potentially triggering a severe headache and ruining your next ski day.

Your protocol for the first two days should be: enjoy the atmosphere, but stick to non-alcoholic drinks. Banff has an incredible après-ski scene in the town itself. Head to a cozy spot with a fire pit, order a delicious hot chocolate or a hearty meal, and soak in the vibrant energy. You can share stories from your day and enjoy the social experience without the physiological cost of alcohol. Save the celebratory on-mountain beers at venues like Mad Trapper’s or the Kokanee Kabin for Day 3 and beyond, once your body has had a chance to properly adjust. This disciplined approach ensures your evenings enhance, rather than sabotage, your vacation.
By separating the social ritual from the alcohol for just two days, you give yourself the best possible chance of feeling strong and ready for the rest of your week on the slopes.
Skiing at -30°C: How to Keep Your Feet Warm All Day?
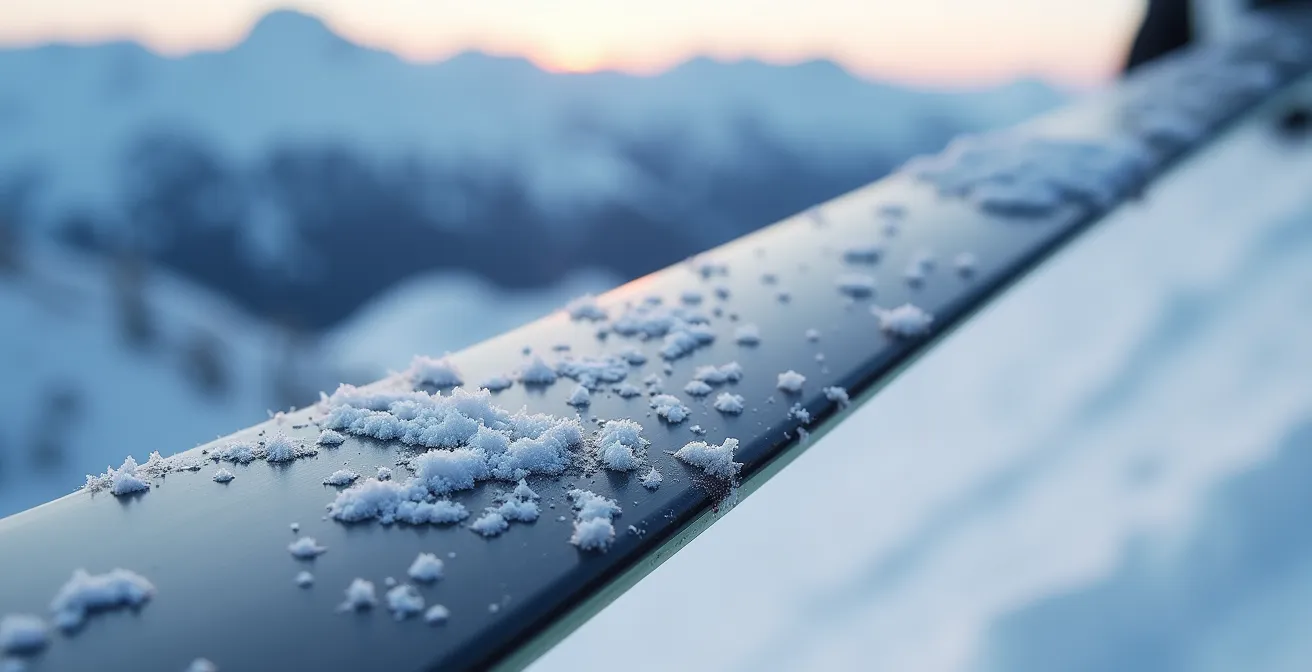
Banff’s legendary cold, dry powder comes at a price: the temperature. It’s not uncommon for local ski reports to indicate that temperatures on the summit of Lake Louise can dip to a brisk -20°C (-4°F) or even colder. Dealing with this level of cold is more than a matter of comfort; it’s another layer of physiological stress your body must manage in addition to the altitude. When your body is cold, it constricts blood vessels in your extremities to preserve core heat. This reduced circulation in your feet not only leads to discomfort but can also exacerbate the effects of altitude by further limiting oxygen delivery to tissues. Keeping your feet warm is a critical part of a holistic acclimatization strategy.
The single most common mistake skiers make is overtightening their boot buckles. While a snug fit is essential for performance, cranking down the buckles like a vice is the fastest way to cut off circulation and guarantee frozen toes. Your boots should be snug, but you should still be able to wiggle your toes freely. Start the day with your buckles looser and tighten them slightly only when you’re about to ski a challenging run. Loosen them again on the chairlift and during breaks. This simple habit makes a world of difference.
Your sock choice is equally crucial. Do not layer multiple pairs of socks. This creates pressure points, restricts blood flow, and can make your feet sweat, which then freezes. The best solution is a single pair of thin-to-midweight, high-quality ski socks made from merino wool or a synthetic blend. These materials wick moisture away from your skin, keeping your feet dry and therefore much warmer. Finally, don’t be a hero. Listen to your body and take regular warm-up breaks in the lodge. A 15-minute stop for a hot drink can completely reset your feet and makes the rest of your day far more enjoyable.
By actively managing cold-related stress, you reduce the total load on your system, allowing it to more effectively and efficiently acclimatize to the high-altitude environment.
How to Embrace -20°C: The Secret to Enjoying Edmonton’s Winter Patios?
While the idea of enjoying an Edmonton winter patio is a testament to Albertan hardiness, for the international skier focused on Banff, the most important “secret” to embracing the cold starts before you even see the mountains. The single most effective logistical decision you can make to prevent altitude sickness is to build a gradual ascent into your travel plans. Flying directly from a sea-level city to Calgary (YYC) and immediately driving up to Banff (4,500 ft) is a significant jump for your body to handle in one go.
A much smarter “Elevation Strategy” is to fly into Calgary and spend your first night in the city. Calgary itself sits at a significant elevation of around 3,500 feet. Spending 12-24 hours there allows your body to make its first, crucial adjustments in a less demanding environment. This overnight stop breaks the total ascent into two more manageable stages. The next day, the drive from Calgary to Banff involves a much smaller final climb. Travel forums often confirm that the 1,000-foot elevation gain from Calgary to Banff is far less shocking to the system than the entire jump from sea level.
This logistical tactic is the secret weapon of seasoned high-altitude travelers. It costs you no ski time—you’d be sleeping anyway—but it pays huge dividends in how you feel on your first day on the slopes. You arrive in Banff already partially acclimatized and better rested, ready to tackle the mountains. While embracing the cold is part of any Canadian ski trip, embracing a gradual ascent is the key to ensuring you’re healthy enough to enjoy it from the very beginning.
By thinking about your acclimatization itinerary before you even book your first night’s hotel, you transform a potential problem into a smooth, seamless, and comfortable start to your vacation.
Are You Safe from Avalanches on Marked Winter Trails in November?
As part of your “take it easy on day one” acclimatization strategy, you might opt for a low-elevation activity like a gentle hike or snowshoe on a marked trail around the Banff townsite. This is an excellent way to let your body adjust while still enjoying the stunning scenery. However, it’s crucial to remember that you are in a wild, dynamic mountain environment. Even on seemingly safe, marked trails, especially during the early season in November when the snowpack is still forming and unstable, awareness is key.
The mountains do not distinguish between a backcountry skier and a casual snowshoer. Avalanche risk is a reality throughout the park. While the trails immediately surrounding the town are generally in low-risk areas, conditions can change rapidly. A trail that is safe one day might be threatened by a new snowfall and wind slab the next. Your logistical plan must always include a safety check.
Before heading out on any trail, no matter how easy it seems, you must adopt the mindset of a mountain professional. As experts at FREESKIER Magazine advise, you should always “check current avalanche conditions with Avalanche Canada.” Their public bulletins are updated daily and provide essential information on snowpack stability and risk levels for different elevation bands. This is a non-negotiable step. It takes only five minutes online and provides the critical information you need to make a safe decision. It’s a simple, logistical task that ensures your relaxing acclimatization day doesn’t turn into a dangerous situation.
By integrating this quick safety check into your daily routine, you demonstrate a respect for the mountains and ensure your entire vacation remains a positive and safe experience.
Key Takeaways
- Your acclimatization strategy begins with your travel logistics; spend your first night in Calgary if possible.
- Use an “Elevation Strategy” for skiing: start at the lower base of Lake Louise (Day 1) before moving to the higher Sunshine Village (Day 2+).
- Adopt a strict “Après-Ski Protocol” for the first 48 hours: prioritize hydration and avoid all alcohol to aid your body’s adjustment.
November or April: Which “Dead Season” Actually Offers Cheap Hotels?
For the value-conscious skier, timing your trip during a “shoulder season” like November or April can unlock significant savings on accommodation. However, when you factor in the quality of the ski experience and the impact on your body, one season clearly offers superior value. While November might present the absolute lowest hotel rates, it’s a classic case of “you get what you pay for.” April, on the other hand, emerges as the strategic choice for maximizing both your budget and your enjoyment.
In November, the ski season is just beginning. Terrain is extremely limited, conditions are often thin and icy, and daylight hours are short (8-9 hours). This means you’re paying for a lift ticket with access to only a fraction of the mountain, under potentially more strenuous conditions—a poor combination when your body is also trying to acclimatize. The low hotel prices reflect a product that is simply not at its peak.
April tells a completely different story. The mountains have a deep and consolidated snowpack, meaning virtually 100% of the terrain is open. You get to enjoy long, sunny days with 13-14 hours of daylight, and the snow conditions are often a glorious mix of winter powder and soft, forgiving spring corn. While hotel rates are slightly higher than in November, the value proposition is exponentially greater. You are paying for the full, uncompromised Ski Big 3 experience. The softer snow is also less physically demanding, which is a bonus for an acclimatizing body.
The following data clearly shows that while November is cheaper on paper, April delivers a far better return on investment for any serious skier.
| Factor | November | April |
|---|---|---|
| Hotel Rates (CAD) | $150-250/night | $250-400/night |
| Snow Conditions | Limited terrain, early season | Full terrain, spring conditions |
| Daylight Hours | 8-9 hours | 13-14 hours |
| Crowds | Very quiet | Moderate (spring break) |
| Value for Skiers | Lower (limited terrain) | Higher (full mountain access) |
Now that you have the strategy to stay healthy and choose the right time to visit, it’s time to start building your personalized Banff ski itinerary. Explore accommodation options and book your shuttles to lock in the best rates for your high-value, high-altitude adventure.