
Successfully completing a 2,000km Alberta road trip depends less on your driving skill and more on preparing for the vast, empty spaces where help is hours away.
- Fuel, cell service, and even paved roads are not guaranteed between towns.
- Minor issues like a rock chip can become major, costly problems under your rental agreement.
Recommendation: Shift your mindset from a typical road trip to one of vehicle self-sufficiency, packing for the worst-case scenario, even in summer.
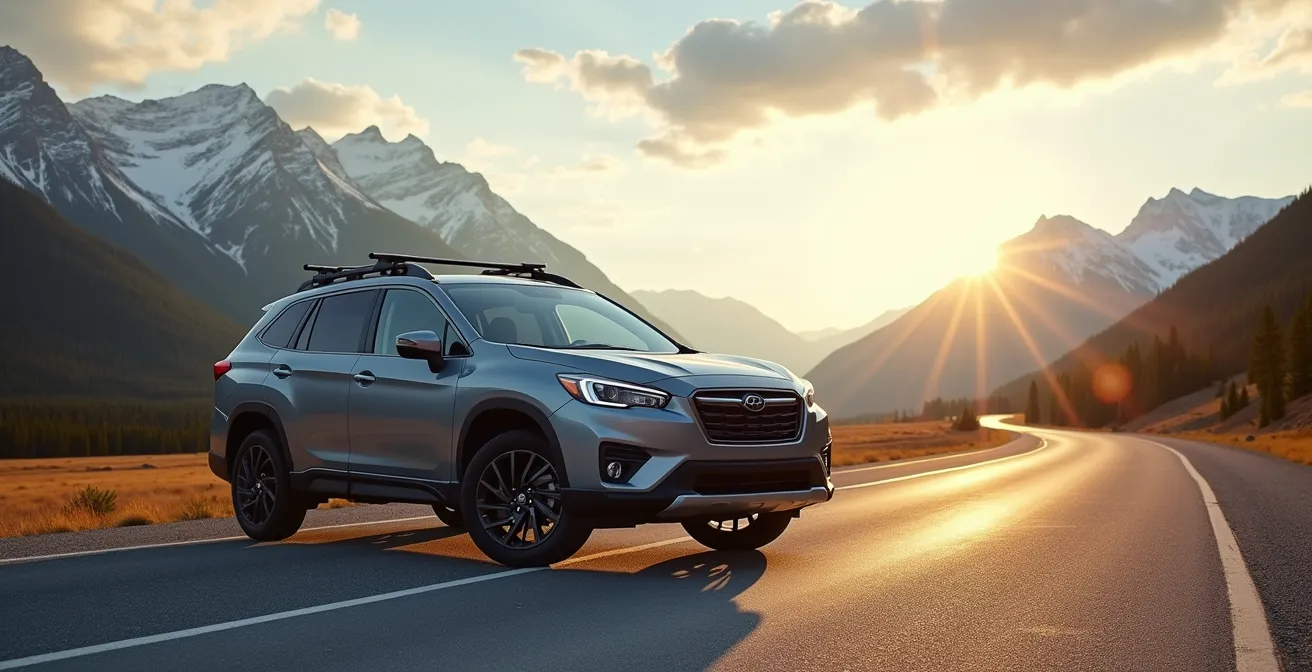
You’ve planned your dream trip through the Canadian Rockies. You’ve booked the flights, the hotels, and a rental car to cover the 2,000 kilometers of stunning Alberta highways. If you’re coming from Europe or Asia, you’re likely a confident driver, used to navigating busy roads and various conditions. But here’s the critical warning you won’t get from the rental counter: your everyday driving habits and expectations are a liability here. The real dangers aren’t just the bears on the side of the road; they are the vast distances between gas stations, the windshield-cracking gravel on paved highways, and the absolute certainty of losing cell signal the moment you leave a townsite.
Many guides will tell you to check your tire pressure and plan your route. That’s basic. It’s the equivalent of being told to pack a swimsuit for a beach holiday. This guide is different. This is your mechanic’s pre-trip inspection, focused on vehicle self-sufficiency. We’re going to address the specific, costly, and potentially dangerous situations that catch unsuspecting travelers off guard. Forget the romantic notion of the open road for a moment. We need to talk about fuel anxiety, damage liability traps, and why a paper map is still your most reliable piece of tech. This isn’t about fear; it’s about respect for the scale of Alberta and ensuring your adventure remains a positive memory, not a cautionary tale.
This article is structured to walk you through the critical preparation stages, from understanding the unique challenges of Alberta’s highways to packing the right gear and planning your drive. Follow these steps to ensure your journey is safe, affordable, and stress-free.
Summary: A Mechanic’s Checklist for Your Alberta Rental Car Adventure
- Gas Station Anxiety: Why You Must Fill Up at Saskatchewan Crossing?
- Rock Chips: Who Pays for the Windshield Crack on Your Rental?
- Blankets and Candles: What Must Be in Your Trunk Even in Summer?
- Audiobooks or I-Spy: How to Survive the 4-Hour Drive from Edmonton to Jasper?
- Paper Maps vs Offline GPS: What Works Best in the Kananaskis Dead Zone?
- SUV vs Compact: Which Rental Car Saves You Money on 2,000km Trips?
- Why Your Cell Phone Will Fail You 10 Minutes Outside of Banff Townsite
- Driving Banff to Jasper: How to Fit 10 Iconic Stops in One Day?
Gas Station Anxiety: Why You Must Fill Up at Saskatchewan Crossing?
In most places, a quarter tank of gas is a reminder to refuel soon. In the Alberta Rockies, it’s a critical alert. The concept of “fuel anxiety” is very real here, born from the 230-kilometer stretch of the Icefields Parkway with only one gas station: Saskatchewan River Crossing. Running out of fuel isn’t just an inconvenience; it’s a major safety issue that could leave you stranded for hours in an area with no cell service. You must adopt a defensive fueling strategy. Never pass a gas station in a major town like Lake Louise or Jasper without filling the tank completely, regardless of how much fuel you think you have left. Think of your fuel gauge not in quarters, but in terms of whether you can reach the next known station.
This strategy extends beyond the parkway. On Highway 11 (David Thompson Highway), your reliable points are Rocky Mountain House and Nordegg. In Kananaskis Country, Fortress Junction is your last bastion. The single station at Saskatchewan River Crossing is a lifeline, not a convenience, and its prices reflect that. You can expect to pay a significant premium. For instance, you could see a $0.50 per litre premium over city prices, so it should be considered an emergency-only option. Always have cash on hand, as remote card readers can be unreliable. Treating every major town as your last chance to fuel up is the only way to ensure your journey isn’t cut short by an empty tank.
Your Alberta Mountain Fuel Strategy: A Checklist
- Fill up completely in Lake Louise or Jasper before entering the Icefields Parkway.
- Note that Saskatchewan River Crossing is the ONLY gas station between Lake Louise and Jasper.
- For Highway 11 (David Thompson), fuel up in Rocky Mountain House or Nordegg.
- For Highway 40 (Kananaskis), use Fortress Junction as your last reliable stop.
- Keep emergency gas money in cash, as remote stations may have card reader issues.
Rock Chips: Who Pays for the Windshield Crack on Your Rental?
On Alberta highways, it’s not a matter of *if* you’ll encounter flying gravel, but *when*. The province uses fine gravel for ice control in winter, which gets swept to the shoulders and kicked up by vehicles all summer. This “asphalt gravel” is a primary cause of chipped and cracked windshields. The critical question is, who pays for this damage on your rental? The answer is almost always: you do, unless you have the right coverage. Relying on your credit card’s Collision Damage Waiver (CDW) is a gamble. Many of these policies explicitly exclude glass damage, leaving you liable for a replacement that can cost hundreds of dollars. The rental company’s Loss Damage Waiver (LDW) is expensive but typically offers the most comprehensive protection, often with a zero deductible for windshields.
Another liability trap is driving on gravel roads. Many tourists don’t realize that even government-maintained gravel roads, like the scenic Smith-Dorrien Trail or Forestry Trunk Road, are often prohibited in rental agreements. As one case study highlights, a renter was held liable for full repair costs from damage on such a road because it violated their contract. The lesson is stark: driving on a forbidden road surface can void your insurance coverage entirely. Before you leave the lot, read your rental agreement’s section on restricted roads and verify your exact coverage for glass damage. A five-minute check can save you from a very expensive surprise.
To clarify your options, it’s crucial to understand the differences in coverage. The following table breaks down what is typically covered by each provider.
| Coverage Type | Windshield Protection | Deductible | Daily Cost |
|---|---|---|---|
| Credit Card CDW | Often excludes glass damage | $0-500 | Free with card |
| Rental Company LDW | Usually included | $0 | $25-35/day |
| Personal Auto Insurance | Check Endorsement 27 | Your policy deductible | Part of premium |
Blankets and Candles: What Must Be in Your Trunk Even in Summer?
It might sound overly dramatic to pack wool blankets and emergency candles for a July road trip, but in the mountains, it’s non-negotiable. A sudden summer snowstorm, a rockslide, or a mechanical breakdown can leave you stranded for hours, far from any help. When the sun drops behind a mountain, temperatures can plummet, even after a hot day. Your vehicle is your only shelter, and you must equip it to function as one. A proper emergency kit is not a suggestion; it’s a critical piece of safety equipment. The goal is to stay warm, hydrated, and safe until help arrives or you can self-rescue. Your kit should be built for the specific challenges of the Alberta environment.
At a minimum, your trunk must contain warm blankets (wool is best) and a survival candle in a tin can, which can provide both light and a surprising amount of heat inside a vehicle. Add emergency space blankets, which are compact and highly effective at retaining body heat. For wildlife safety, carry bear spray, but store it in the center console or door pocket—never in a hot trunk where it can overheat. A whistle is a simple but effective tool for signaling for help. Beyond survival gear, include basic vehicle items like jumper cables and a tire pressure gauge. Finally, pack at least four litres of water per person and non-perishable snacks. This isn’t about preparing for the apocalypse; it’s about respecting the fact that in the vastness of Alberta, you are your own first responder.
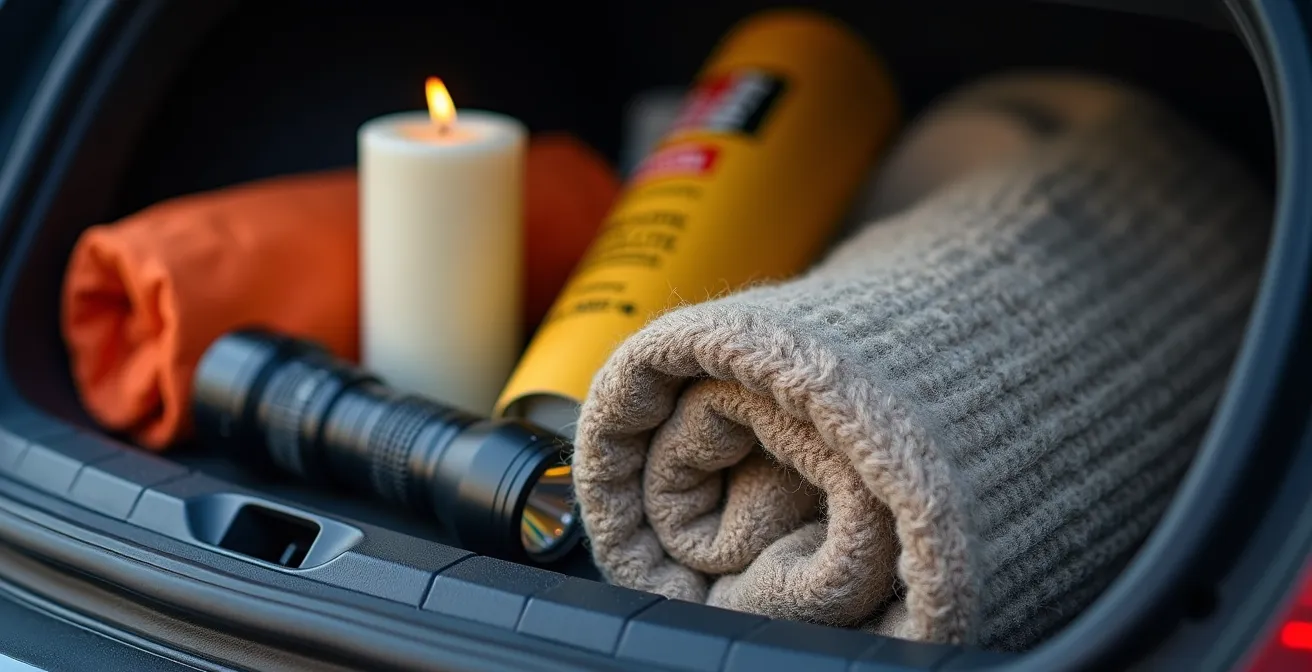
As you can see, the kit focuses on core survival needs: warmth, hydration, and signaling. Each item is chosen for its reliability in a no-power, no-service situation. Don’t rely on your phone’s flashlight; a dead battery renders it useless. A physical kit is your most dependable lifeline.
Audiobooks or I-Spy: How to Survive the 4-Hour Drive from Edmonton to Jasper?
The drive from Edmonton to Jasper is a journey of transition. It begins with the flat, predictable prairies and slowly gives way to the foothills and finally, the stunning peaks of the Rockies. However, a significant portion of this four-hour drive on Highway 16 can be monotonous. For travelers, especially those with families, surviving this stretch without succumbing to boredom or driver fatigue requires a specific entertainment strategy. The first rule is to download all your content before leaving Edmonton. Cell service becomes unreliable past the town of Edson, so streaming music or podcasts is not a viable option. Prepare an Alberta-themed playlist featuring local artists or download several hours of audiobooks and podcasts to keep your mind engaged.
Beyond digital entertainment, planning a strategic stop is the best way to break up the drive. The town of Hinton, located about an hour before Jasper, is the perfect halfway point. As recommended by seasoned travelers, a visit to the Beaver Boardwalk offers a 3km nature walk to stretch your legs and a chance to see Canada’s national animal in its natural habitat. Afterward, grabbing lunch at a local spot like The Old Grind provides a welcome break and a taste of local culture. This pause is more than just a rest stop; it’s a way to reduce driver fatigue and add an enjoyable experience to what can otherwise be a long haul. For families, pre-made games like “Landscape Bingo” with squares for pumpjacks, canola fields, and the first mountain sighting can turn the drive into an interactive activity.
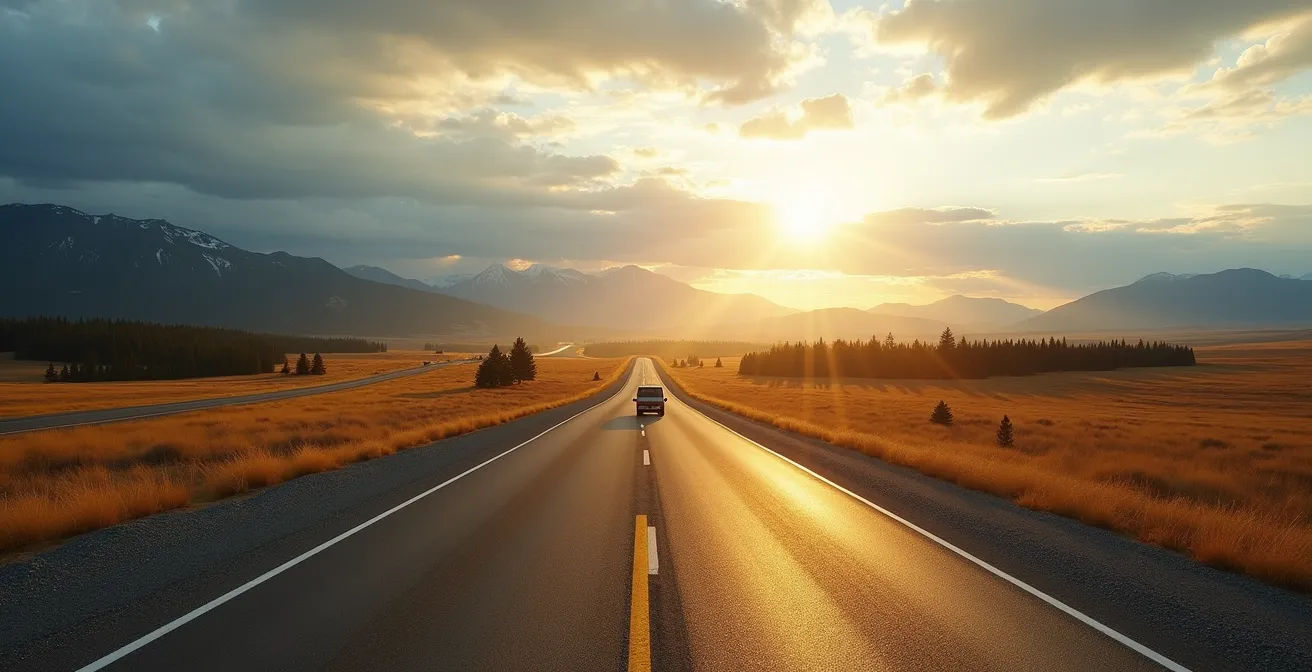
The vast, open landscape is part of the Alberta experience. Instead of just enduring it, plan to engage with it. The anticipation builds as the landscape changes, and having a plan to manage the long, straight sections ensures you arrive in Jasper refreshed and ready to explore.
Paper Maps vs Offline GPS: What Works Best in the Kananaskis Dead Zone?
In an age of constant connectivity, relying solely on your phone’s GPS for navigation in the Alberta mountains is a rookie mistake. Major areas like Kananaskis Country, particularly the Smith-Dorrien corridor, are notorious “cellular deserts.” While downloading offline Google Maps for the region is a mandatory first step, it has its limits. Offline maps are excellent for main highways but often lack detail on smaller roads, provide no topographical information, and won’t show real-time closures for things like wildlife activity or road maintenance. This is where old-fashioned technology proves its superiority. A physical Backroad Mapbook is the single most reliable tool for navigating Alberta’s backcountry.
The Backroad Mapbook provides comprehensive detail that digital maps miss, including logging roads, crown land access, and, most importantly, indications of seasonal gates and road conditions. This is critical for avoiding situations like the common GPS misdirection onto the gravel Smith-Dorrien Trail (Highway 742). GPS apps might suggest it as a shortcut, but as we’ve discussed, driving it could violate your rental agreement. The mapbook shows it clearly as a loose-surface road, allowing you to make an informed, contract-safe decision. For hikers, an app like AllTrails Pro is a great supplement for trail-specific data, but it also requires pre-downloading maps. For true emergencies, a satellite messenger like a Garmin inReach offers two-way messaging and an SOS function, but it’s an expensive piece of gear. For 99% of travel, the combination of offline digital maps and a physical mapbook is the gold standard for safe and reliable navigation.
Choosing the right navigation tool depends on your planned activities. This table breaks down the best use cases and limitations for each option.
| Navigation Tool | Best For | Limitations | Cost |
|---|---|---|---|
| Offline Google Maps | Main highways, basic navigation | Missing trail details, no topography | Free |
| AllTrails Pro | Hiking trails, elevation data | Requires pre-download of specific areas | $35.99/year |
| Backroad Mapbooks | Complete coverage, logging roads, crown land | Bulky, no real-time position | $29.95 |
| Garmin inReach | Emergency SOS, two-way messaging | Expensive, requires subscription | $450+ device |
SUV vs Compact: Which Rental Car Saves You Money on 2,000km Trips?
When you’re booking a rental for a 2,000km trip, the temptation is to choose an SUV. They seem more rugged, spacious, and better suited for mountain roads. However, from a purely financial and practical standpoint, a compact car is often the smarter choice. The first and most obvious saving is the rental cost itself. Analysis consistently shows that small rental cars in Alberta are around 52% cheaper than other categories. Over a multi-day trip, this adds up to a significant saving that can be better spent on experiences.
The second saving is fuel. A smaller, lighter car with a more efficient engine will consume far less gasoline over 2,000 kilometers than a heavy SUV. Given the premium fuel prices in remote areas, this fuel efficiency translates directly into more money in your pocket. But what about performance? Modern compact cars are perfectly capable of handling Alberta’s paved highways, including the steep grades on the Icefields Parkway. The idea that you *need* an SUV is largely a myth, unless you plan to haul a lot of gear or have a large family. For two to three people with standard luggage, a compact car offers ample space. The only tangible benefit of an SUV for a typical tourist is slightly higher ground clearance, which is irrelevant if you’re correctly adhering to your rental agreement and staying off prohibited gravel roads. By choosing a compact, you save on the rental, save on fuel, and remove the temptation to venture onto roads that could lead to costly contract violations.
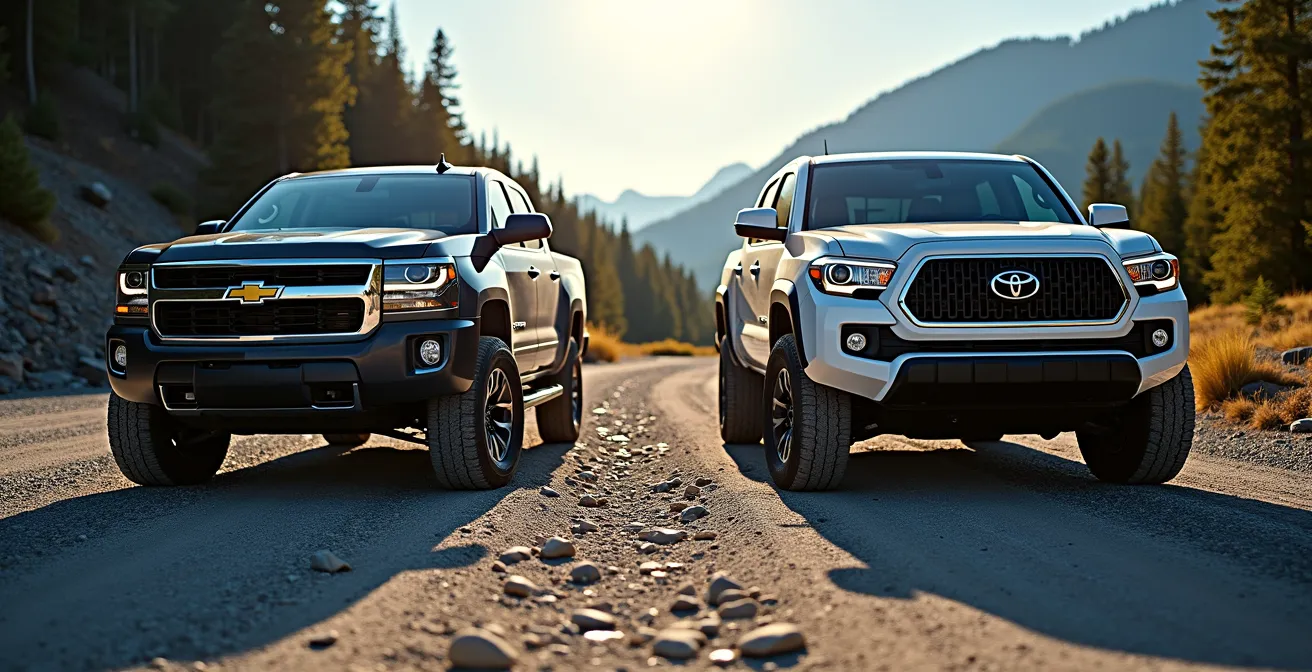
The visual difference in ground clearance is clear, but unless your itinerary requires travel on rough, unmaintained roads (which your rental contract forbids), that extra height is an expensive and unnecessary feature. The smart money is on the smaller, more efficient vehicle.
Why Your Cell Phone Will Fail You 10 Minutes Outside of Banff Townsite
In the town of Banff, you’ll have perfect 5G reception. You can stream video, upload photos, and navigate with ease. Step ten minutes outside the townsite in almost any direction, and your phone will become little more than a camera. The mountainous terrain of the Canadian Rockies creates massive cellular blackouts, and tourists who rely on their phones for everything are often caught dangerously unprepared. There are three major, near-total “cellular deserts” you must be aware of: the entire 230km Icefields Parkway, most of Kananaskis Country, and large sections of the David Thompson Highway. Expecting to have service for a quick call, to check the weather, or to look up directions is not just optimistic; it’s reckless.
This reality requires a fundamental shift in behavior. Before you leave a major hub like Calgary or Banff, you must download offline maps of the entire region you plan to visit. Tell someone your exact itinerary and a planned check-in time, so they know when to raise an alarm if they don’t hear from you. Your communication strategy should revolve around “communication checkpoints”—physical locations with known Wi-Fi, such as the Columbia Icefield Discovery Centre, the Lake Louise Visitor Centre, or the library in Nordegg. These are your opportunities to send “I’m safe” messages to family and check for urgent communications. Furthermore, while Rogers has good urban coverage, Bell and Telus are generally considered to have a better network footprint in the mountains. If you’re buying a Canadian SIM, this is a crucial factor to consider. Ultimately, you must operate under the assumption that you will have no service for the majority of your driving time.
Your Cell Service Survival Checklist for the Rockies
- Before leaving a major city, download offline maps for your entire trip area on Google Maps.
- Enable Wi-Fi Calling on your phone for potential use at lodges or visitor centres.
- If buying a SIM, choose a Bell or Telus-compatible provider for better mountain coverage over Rogers.
- Plan specific communication stops at places with public Wi-Fi (e.g., visitor centres).
- Carry a written list of emergency numbers; a screenshot is useless if your phone dies.
- Inform a reliable contact of your exact route and expected check-in times.
Key Takeaways
- Never let your gas tank fall below half; the next station could be over 100km away.
- Verify your rental insurance specifically covers windshields; it’s the most common damage claim.
- Pack a physical emergency kit with blankets and water; your car is your shelter in a breakdown.
- Cell service is non-existent on most scenic highways; download maps and have a communication plan.
Driving Banff to Jasper: How to Fit 10 Iconic Stops in One Day?
The drive between Banff and Jasper on the Icefields Parkway is consistently ranked among the most beautiful in the world. It’s not a simple transit; it’s the destination itself. The challenge is that the 230km route is packed with dozens of potential stops, from 5-minute photo ops to multi-hour hikes. Trying to do it all in one day is impossible and will lead to a rushed, stressful experience. The key to a successful one-day journey is ruthless prioritization and strategic time budgeting. You must categorize stops into three tiers: quick roadside pullouts (e.g., Crowfoot Glacier, Bow Lake viewpoint), medium-length leg stretchers (e.g., Peyto Lake, Mistaya Canyon), and major time commitments (e.g., Athabasca Glacier experiences, Parker Ridge Trail). A realistic plan includes a maximum of one or two major commitments, a few medium stops, and as many quick photo ops as you like.
An expert-level strategy to maximize your day is the “Southbound Advantage.” Most travelers drive from Banff to Jasper (northbound). By doing the reverse—driving from Jasper to Banff—you gain several advantages. You keep the sun at your back for most of the day, which is better for photography. You also avoid the significant morning traffic jams leaving Banff and Lake Louise. The parking lot at Athabasca Falls, a popular stop near Jasper, is notoriously small; starting your day there early means you beat the crush of tour buses that arrive from the south mid-morning. Finally, this strategy allows for smart substitutions. Instead of fighting the crowds at Johnston Canyon (which is technically not on the parkway but a common detour), travelers report that opting for the more serene and equally spectacular Mistaya Canyon can save over two hours while delivering a better experience.
This table provides a rough time budget to help you plan your day and make realistic choices about which iconic spots to visit.
| Stop Category | Time Needed | Examples | Parking Difficulty |
|---|---|---|---|
| 5-Min Photo Ops | 5-10 minutes | Crowfoot Glacier, Bow Lake viewpoint | Easy – roadside pullouts |
| 30-Min Leg Stretchers | 20-40 minutes | Peyto Lake, Mistaya Canyon | Moderate – larger lots |
| 90-Min+ Experiences | 1.5-3 hours | Athabasca Glacier, Parker Ridge Trail | Difficult – arrive early/late |
Now that your vehicle is properly equipped and your route is planned, the final step is to conduct a personal pre-drive check. Ensure you are well-rested, have all necessary documents easily accessible, and have communicated your plan to someone back home. Your preparation is the best guarantee of a safe and memorable journey.