
In summary:
- Flying from sea level to Banff (1,400m+) exposes your body to moderate hypoxia, a physiological stress many visitors underestimate.
- Generic advice like “drink water” is insufficient; prevention requires a structured acclimatization plan and understanding how altitude amplifies stressors like alcohol and exertion.
- Success depends on targeted choices in gear (layering, footwear) and planning (timing, trail selection) to actively manage your body’s response to lower oxygen levels.
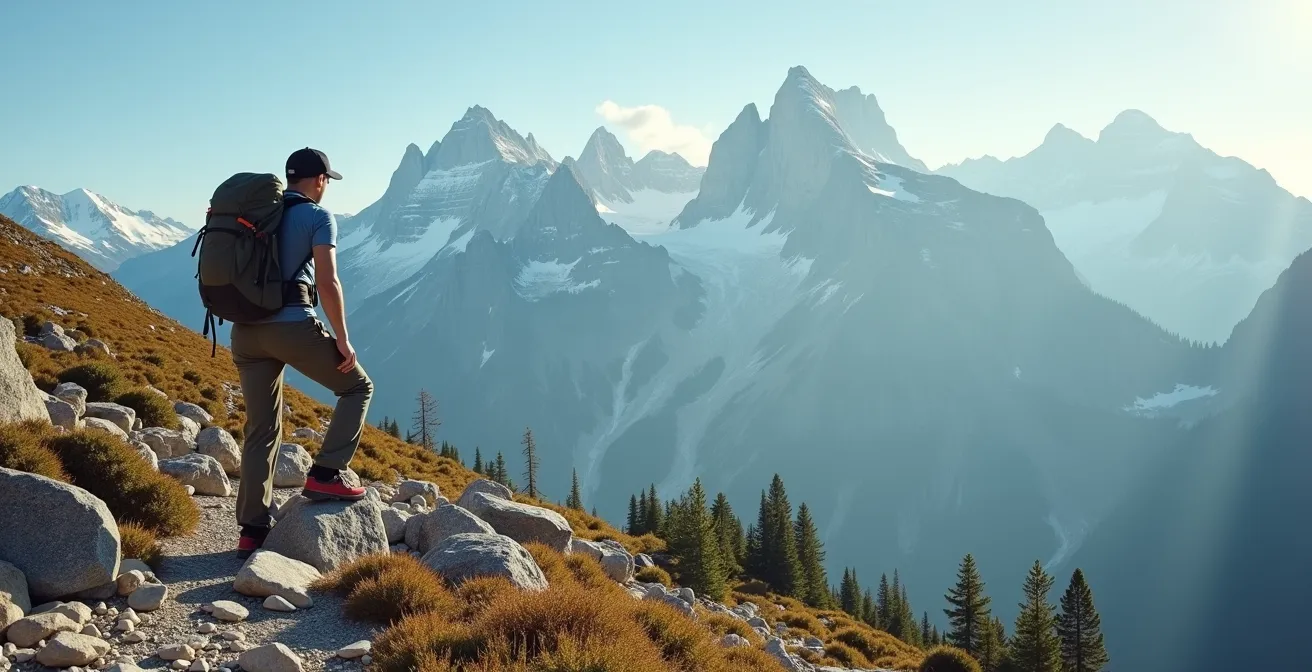
You’ve just arrived in Banff National Park, flying in from a low-elevation home like London or the US East Coast. The air is crisp, the mountains are majestic, and you set out for what is rated as an “easy” hike around Lake Louise. Within minutes, you’re gasping for air, your head begins to throb, and you feel a profound sense of fatigue. This experience is disconcertingly common. Many visitors are told to simply “drink more water” or “take it easy,” but these platitudes fail to address the root cause of this malaise.
The issue isn’t a lack of fitness; it’s a fundamental misunderstanding of physiology. The Canadian Rockies present a unique challenge: a “moderate” base elevation that is high enough to induce significant physiological stress but not so high that visitors treat it with the caution it deserves. Your body is suddenly operating in a state of moderate hypoxia, where less oxygen is available with every breath. This environment amplifies the effects of exertion, dehydration, and even a single glass of wine.
But what if the key to enjoying your trip wasn’t just enduring these symptoms, but actively preventing them by understanding the science? This guide moves beyond generic advice to provide a physiologist’s perspective on preparation. We will deconstruct the specific stressors you’ll face—from the oxygen-deprived air to the treacherous terrain and volatile weather—and provide evidence-based strategies to manage them. It’s about respecting the altitude not as an obstacle, but as a variable you can control through intelligent preparation.
This article will break down the crucial decisions you need to make, from your arrival strategy to the contents of your daypack. By understanding the ‘why’ behind each recommendation, you can build a resilient travel and hiking plan that allows you to experience the full grandeur of the Rockies safely and comfortably.
Summary: A Physiologist’s Guide to Banff Altitude Preparation
- Why One Glass of Wine at 7,000 Feet Feels Like Three?
- Rockies vs Foothills: What Landscape Differences Define Your Hiking Experience?
- Merino or Synthetic: What Base Layer Saves You from Hypothermia in August?
- Boots or Trail Runners: Which Footwear Survives Sharp Limestone Rocks?
- Early June or Late July: When Are the High Alpine Trails Finally Snow-Free?
- Why Can’t I Catch My Breath on an “Easy” Hike at Lake Louise?
- Base, Mid, Shell: What is the Correct Layering Sequence for Rockies Hiking?
- How to Pack for a Day Hike That Starts at 20°C and Ends at -5°C?
Why One Glass of Wine at 7,000 Feet Feels Like Three?
The common advice to avoid alcohol at altitude is often perceived as overly cautious, but its physiological basis is robust. At elevations like Banff and Lake Louise (approximately 4,500 to 5,700 feet), your body is already under the stress of moderate hypoxia, meaning there’s less oxygen available for your blood and tissues. Introducing alcohol into this environment acts as a significant physiological disruptor. It doesn’t simply make you feel more intoxicated; it actively sabotages your body’s ability to acclimatize. The primary mechanism is its effect on your respiratory system.
One of the body’s first and most critical responses to altitude is to increase the rate and depth of breathing—a process known as the hypoxic ventilatory response. This helps compensate for the thinner air. However, alcohol acts as a respiratory depressant. As one clinical study highlights, it interferes with this crucial adaptation. The research team noted:
Alcohol inhibits the initial stages of adequate acute ventilatory adaptation to mild hypoxia at moderate altitude. Caution in the use of alcoholic beverages at moderate altitude is therefore necessary.
– Research team, Clinical study on alcohol and altitude
This inhibition means your body cannot effectively increase its oxygen intake to meet demands, exacerbating the symptoms of altitude sickness like headaches and dizziness. While early research by R.A. McFarland in the 1930s suggested 2-3 drinks at altitude feel like 4-5 at sea level, modern physiology focuses on this dangerous suppression of acclimatization. Even if blood alcohol content isn’t dramatically different, as Federal Aviation Administration research confirms, the functional impairment and physiological strain are significantly greater. Forgoing that celebratory drink on your first couple of nights is not just a suggestion; it’s a critical component of a safe acclimatization strategy.
Rockies vs Foothills: What Landscape Differences Define Your Hiking Experience?
The most common mistake visitors make is treating their arrival in Banff as the start of their acclimatization. From a physiological standpoint, this is too late. Flying directly from sea level to the Banff townsite at 1,383m (4,537 ft) is an abrupt shock to the system. The key to mitigating this stress lies in a strategy of progressive ascent, using the unique geography of Alberta to your advantage. This is the acclimatization gradient: a staged approach that allows your body to produce more red blood cells and adjust to lower oxygen levels incrementally.
The ideal plan begins not in the Rockies, but in the Foothills. Starting your trip with a day and night in Calgary (1,048m) or a nearby area like Bragg Creek provides a gentle introduction to elevation. This initial step gives your body a crucial 24-hour head start on the acclimatization process before you ascend further. From there, you can progress to Canmore and then Banff, saving the highest accessible elevations for last. The goal is to avoid shocking your system with a sudden, large jump in altitude. Hikes in the Lake Louise area, with a base elevation of 1,750m, should only be attempted after at least two days at lower mountain elevations.
This staged approach is especially critical given the elevations of popular attractions. While the valley floors seem manageable, the two main ski resorts near Banff reach elevations where symptoms are far more likely. Lake Louise Ski Resort’s summit hits 2,637m (8,652 ft) and Sunshine Village’s top lift station is at 2,730m (8,957 ft). Ascending to these heights without a gradual acclimatization plan is a primary trigger for Acute Mountain Sickness (AMS). A wise itinerary treats the Foothills as a physiological launchpad, not just a geographical prelude to the main event.
Your Graduated Altitude Acclimatization Plan
- Day 0: Arrive and stay in Calgary (1,048m) or the Bragg Creek foothills for a low-altitude warm-up.
- Day 1: Move to Canmore and attempt easy trails at moderate elevation, such as Grassi Lakes.
- Day 2: Progress to hikes around the Banff townsite (1,383m), like Tunnel Mountain or the Bow River Loop.
- Day 3: Attempt trails in the Lake Louise area (base 1,750m), such as the Lake Agnes Teahouse.
- Rule: Wait at least 24 hours after arriving in Banff before ascending to ski resort elevations above 2,500m.
Merino or Synthetic: What Base Layer Saves You from Hypothermia in August?
In the Canadian Rockies, temperature is a weapon, and moisture is its delivery system. A common and dangerous mistake is to focus solely on the forecasted daytime high, ignoring the dual threats of exertion-induced sweat and rapid temperature drops. Your base layer—the fabric directly against your skin—is not just for warmth; it’s your primary tool for moisture management and creating a stable thermal microclimate. A wet base layer at altitude can rapidly lead to hypothermia, even on a summer afternoon. The choice between merino wool and synthetic fabrics is therefore a critical physiological decision.
Merino wool’s primary advantage is its ability to insulate even when damp. Its complex fiber structure can absorb up to 30% of its weight in water vapor without feeling wet to the touch, and it retains much of its thermal property when saturated. This makes it ideal for stop-start activities, like a strenuous climb followed by a windy break at the summit, where you are most vulnerable to a chill. Synthetics, conversely, excel at wicking moisture away from the skin and drying extremely quickly. However, they lose almost all insulating value when wet, making you feel a dramatic and immediate cold if you stop moving while sweaty.
The choice depends on the activity’s intensity and your personal physiology. For high-output, continuous activities where you expect to sweat profusely (like trail running), a fast-drying synthetic may be superior. For classic day hiking with variable paces and rest stops, merino’s “warm-when-wet” property offers a crucial safety margin against hypothermia. Some of the most advanced base layers now use a hybrid approach, placing different materials in key body zones to optimize both warmth and wicking.

This table breaks down the core performance differences to guide your selection based on physiological needs, not just marketing claims. Ultimately, a wet cotton t-shirt is the most dangerous item you can wear; both merino and quality synthetics are designed to prevent that scenario.
| Feature | Merino Wool | Synthetic (e.g., Polyester) |
|---|---|---|
| Warmth When Wet | Retains warmth even when damp | Loses insulation rapidly when wet |
| Odor Resistance | Excellent (natural antimicrobial properties) | Poor (requires chemical treatments) |
| Dry Time | Slower to dry | Very fast to dry |
| Best For | Stop-start activities, cold weather hiking | High-intensity, continuous sweaty conditions |
Boots or Trail Runners: Which Footwear Survives Sharp Limestone Rocks?
Footwear choice in the Rockies is another area where underestimation leads to trouble. Visitors accustomed to smooth, soil-based trails elsewhere are often unprepared for the characteristic terrain of Banff: sharp, fractured limestone and unstable scree slopes. Choosing footwear is not about comfort alone; it’s about injury prevention, energy conservation, and stability, all of which directly impact your physiological state at altitude. The wrong shoes can lead to exhaustion, slips, and ankle injuries, dramatically increasing your susceptibility to AMS.
Trail runners, with their lightweight and flexible design, are tempting. They are perfectly adequate for well-maintained, low-elevation paths like the Johnston Canyon catwalk or the paved trails around the Banff townsite. On these surfaces, their breathability and comfort are assets. However, as soon as you venture onto a true mountain trail, their limitations become a liability. They offer minimal ankle support, leaving you vulnerable on uneven, rocky ground. Furthermore, their soft soles provide little protection against the sharp limestone fragments that can bruise or even puncture the bottom of your foot, causing significant pain and fatigue.
Sturdy hiking boots are the appropriate tool for the vast majority of Banff’s iconic trails. Their value lies in three key features:
- Ankle Support: A higher cuff stabilizes the ankle joint, preventing dangerous rolls on shifting scree or uneven rock fields.
- Sole Protection: A stiff midsole and a hard rubber outsole with a rock plate act as a shield against sharp limestone, conserving energy you would otherwise spend carefully placing each step.
- Durability: The abrasive nature of Rockies scree can shred the mesh uppers of trail runners in a single hike. Boots are built to withstand this abuse.
Case Study: Johnston Canyon vs. Sulphur Mountain
A tale of two trails illustrates this perfectly. For the gentle, paved walk through Johnston Canyon, a visitor in trail runners will be comfortable and efficient. The predictable surface requires minimal support. In contrast, tackling the sustained, rocky climb up Sulphur Mountain in the same shoes is a recipe for disaster. The constant stress on unsupported ankles and the impact of sharp rocks through the thin sole will lead to premature fatigue and a heightened risk of a trip or fall, compounding the physiological stress of the altitude gain.
Early June or Late July: When Are the High Alpine Trails Finally Snow-Free?
Timing your visit to Banff is about more than just avoiding crowds; it’s a critical decision that dictates which trails are safely accessible. A major miscalculation for many visitors, especially those from warmer climates, is assuming that “summer” in the Rockies means snow-free trails. High-elevation routes often remain under deep, hazardous snow well into July. Attempting these trails too early in the season introduces a severe physiological stressor: post-holing.
Post-holing is the exhausting act of breaking through a soft snow crust with every step, often sinking to your knees or even your thighs. This type of movement requires an immense amount of energy—far more than regular hiking. At altitude, where your body is already struggling with less oxygen, this extreme exertion can rapidly trigger the symptoms of AMS. It turns a planned 5-mile hike into the physiological equivalent of a 15-mile slog, leaving you exhausted, dehydrated, and vulnerable. Furthermore, hidden hazards like creeks or sharp rocks can lie just beneath the snow surface.
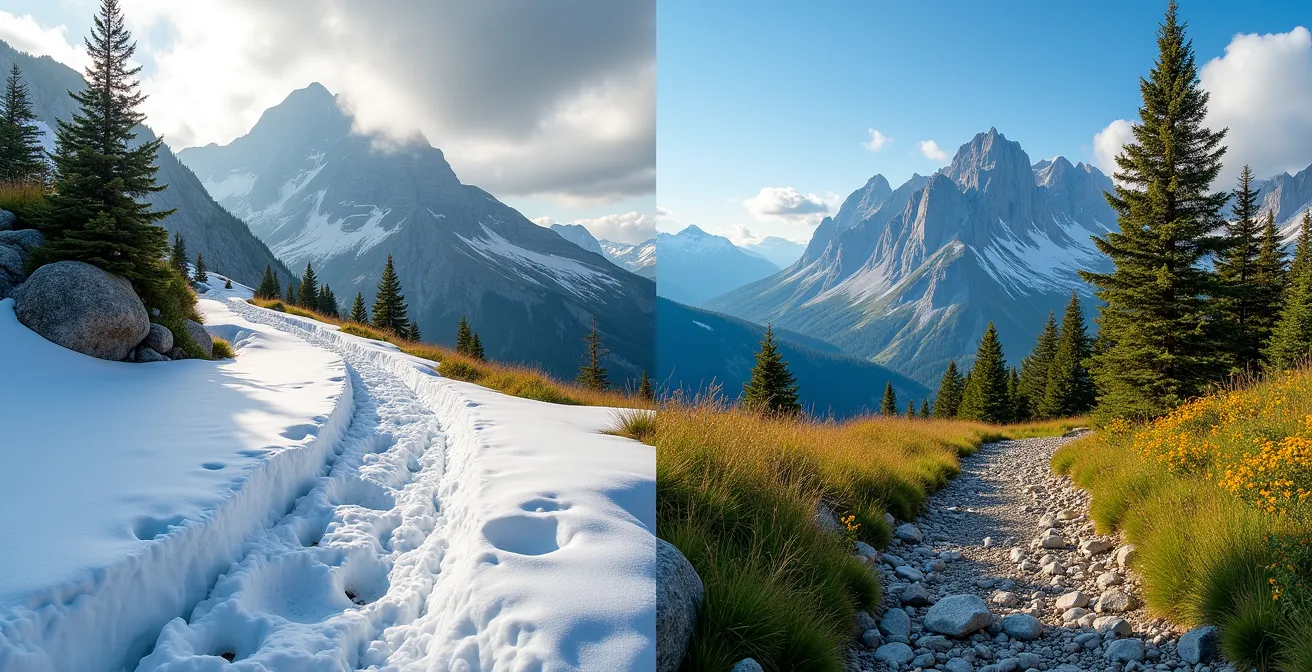
The general rule of thumb, backed by historical data, is that trails at lower elevations (around Banff and Canmore) are typically clear by mid-to-late June. However, the coveted high alpine trails—those that take you above the treeline into the realm of glaciers and stunning vistas—are a different story. According to Parks Canada historical data, trails above 2,500 meters (8,202 feet) typically remain snow-covered until late July. This includes iconic hikes like Sentinel Pass and the Larch Valley, which usually become fully accessible without significant snow hazards only by the last week of July or the first week of August.
Before any hike, it is absolutely essential to check the official Parks Canada trail reports for current conditions. Relying on a date on the calendar instead of real-time information is a dangerous gamble. Choosing a trail that is appropriate for the season is as important as choosing the right gear; it’s a fundamental part of managing your energy and safety at altitude.
Why Can’t I Catch My Breath on an “Easy” Hike at Lake Louise?
The feeling of being perpetually out of breath is perhaps the most common and unsettling symptom for visitors in the Lake Louise area. Many attribute it to being out of shape, but this is a physiological fallacy. The culprit is the elevation itself. What feels like a flat, simple walk along the lakeshore is taking place at a significant altitude that your body is not accustomed to. Understanding the numbers is key to reframing the experience from one of self-doubt to one of physiological awareness.
The shoreline of Lake Louise sits at 1,750m (5,740ft). As data from local guides highlights, the significant elevation difference means this is 367m (1,204ft) higher than the Banff townsite and a staggering 702m (2,303ft) higher than Calgary. At this altitude, the partial pressure of oxygen is approximately 82% of what it is at sea level. This means that with every breath, you are taking in almost 20% less oxygen. Your body’s immediate and correct response is to breathe faster and deeper (hyperventilation) and increase your heart rate to circulate oxygenated blood more quickly. This is not a sign of poor fitness; it is a sign of a healthy body trying to adapt.
The danger lies in misinterpreting these normal adaptive responses or ignoring them when they are coupled with other warning signs of Acute Mountain Sickness (AMS). Breathlessness during exertion that subsides with rest is normal. A throbbing headache that doesn’t go away with hydration, accompanied by nausea or dizziness, is not. Learning to differentiate between normal acclimatization and the onset of AMS is a critical skill for any mountain visitor.
Your Symptom Check: Normal Adaptation vs. AMS Warning Signs
- Normal Adaptation: Experiencing breathlessness during exertion that improves significantly with rest.
- Normal Adaptation: Noticing an increased heart rate during physical activity.
- AMS Warning Sign: A persistent, throbbing headache, often worse at night and not relieved by simple painkillers or hydration.
- AMS Warning Sign: The onset of nausea, vomiting, or a complete loss of appetite.
- AMS Warning Sign: Feeling dizzy, light-headed, or experiencing a sense of instability (ataxia).
- Action Required: If you experience a headache plus one or more other warning signs, the safest and only reliable course of action is to descend to a lower altitude immediately.
Base, Mid, Shell: What is the Correct Layering Sequence for Rockies Hiking?
The concept of “layering” is often presented as a simple clothing tip, but in the context of mountain physiology, it’s a dynamic system for thermal regulation. The dramatic temperature swings in the Rockies require an active approach to managing your body’s heat. The goal of the three-layer system—base, mid, and shell—is to maintain a stable core temperature, preventing both overheating (which leads to excessive, dangerous sweating) and hypothermia (which drains energy and impairs judgment). Each layer has a distinct physiological role.
1. Base Layer: As discussed, this layer’s job is moisture management. It wicks sweat away from your skin to keep you dry. A wet base layer is the fastest path to a dangerous chill. 2. Mid Layer: This is your insulation layer. Its purpose is to trap air warmed by your body. Materials like fleece or down/synthetic “puffy” jackets are effective. The key is that this layer should be adaptable; you might wear a light fleece for a cool start and carry a warmer puffy jacket for the summit. 3. Shell Layer: This is your protection from the elements. A good shell is both windproof and waterproof. Its primary role is to prevent convective heat loss from wind and to keep your insulation (mid-layer) dry from rain or snow. Without a shell, even the best insulation becomes useless in windy conditions.
The system’s effectiveness comes from its modularity. You constantly add or remove layers to respond to changes in your exertion level and the environment. Starting a hike cold is often a good sign, as you will warm up quickly. Removing your mid-layer before a steep ascent prevents overheating. Adding your shell at a windy ridge immediately protects your trapped body heat.
Case Study: The Banff Gondola Temperature Shock
The Banff Gondola provides a perfect real-world example. A visitor starts at the valley floor in a t-shirt, enjoying a warm 20°C day. They ride the gondola to the summit at 2,281m (7,486 ft), where the temperature is near freezing and a fierce wind is blowing. Without proper layers, their body temperature plummets. The correct approach is to wear a base layer, add a fleece (mid-layer) for the gondola ride, and put on a windproof shell jacket immediately upon exiting at the exposed, windy summit to prevent rapid heat loss.
| Altitude Zone | Base Layer | Mid Layer | Shell Layer |
|---|---|---|---|
| Valley Floor (1,300-1,500m) | Lightweight merino or synthetic | Optional light fleece | Packed in backpack |
| Mid-Mountain (1,500-2,000m) | Midweight base layer | Fleece or light insulated vest | Windbreaker easily accessible |
| Alpine (2,000m+) | Midweight merino | Insulated ‘puffy’ jacket | Windproof/waterproof shell worn |
Key Takeaways
- Moderate Altitude is Still a Stressor: The 1,400m+ base elevation of Banff significantly reduces oxygen availability, requiring your body to work harder even at rest.
- Acclimatization is an Active Process: Preventing symptoms requires a deliberate, gradual ascent (e.g., Calgary -> Canmore -> Banff) and avoiding physiological inhibitors like alcohol.
- Environmental Management is Key: Your choice of clothing and gear is not about comfort, but about actively managing physiological threats like hypothermia, exhaustion, and injury.
How to Pack for a Day Hike That Starts at 20°C and Ends at -5°C?
Your daypack for a hike in the Canadian Rockies is not a collection of “just-in-case” items; it is a portable life-support system designed to counteract the specific physiological stressors of the mountain environment. The most significant of these is the extreme temperature volatility. A hike that begins in a sun-drenched, 20°C valley can easily end on a windy, shaded summit where the effective temperature plunges below freezing. This is due to the standard atmospheric lapse rate, where temperature can drop approximately 6.5°C for every 1,000 meters of elevation gained, an effect compounded by wind chill and shade.
Packing correctly means anticipating these changes and carrying the tools to manage them. The goal is to prevent your body from wasting precious energy—energy it needs to cope with lower oxygen levels—on simply trying to stay warm. Every item in your pack should have a specific physiological purpose. Sunscreen and sunglasses combat the intensified UV radiation at altitude, which can cause exhaustion and dehydration. High-carbohydrate snacks provide easily accessible fuel for your working muscles. Extra water is non-negotiable to combat the increased respiratory fluid loss in the dry, cold air.
The most critical items, however, are those related to thermal regulation. A toque (beanie) and gloves are essential, even in August, as a significant amount of body heat is lost through the head and extremities. An extra insulation layer (like a packable down jacket) and a windproof shell are your primary defenses against a sudden, life-threatening drop in core body temperature. These items are not optional; they are the fundamental components of your mountain safety system.
Your High-Altitude Day Pack Checklist
- Thermal Regulation: A toque (beanie) and lightweight gloves, regardless of the season.
- Insulation: An extra insulation layer, such as a packable down or synthetic “puffy” jacket.
- Weather Protection: A windproof/waterproof shell jacket to block convective heat loss.
- Traction: Microspikes for unexpected icy sections, especially in shaded areas or early/late season.
- Sun Protection: A wide-brimmed hat, sunglasses, and high-SPF sunscreen.
- Hydration & Fuel: A minimum of 2 litres of water and high-carbohydrate snacks (e.g., energy bars, dried fruit).
Therefore, your next step is to transform this physiological knowledge into a concrete personal preparation plan before your departure. By meticulously planning your acclimatization gradient, selecting appropriate gear for the specific conditions, and packing your daypack as a targeted response system, you empower yourself to work with the mountain environment, not against it.
Frequently Asked Questions About Banff Trail Conditions
What is ‘post-holing’ and why is it dangerous at altitude?
Post-holing occurs when you break through soft, deep snow with each step, sinking to your knee or thigh. This is an extremely exhausting movement that dramatically increases your heart rate and oxygen demand. Performing this level of exertion in a low-oxygen environment can be a rapid trigger for Acute Mountain Sickness (AMS).
Which popular trails are accessible year-round?
Lower elevation paths are generally accessible throughout the year, though conditions vary. Trails like Johnston Canyon (lower falls), the Bow River Trail in Banff, and the paths around the Banff townsite can be hiked in winter, but often require ice cleats or microspikes for safety on icy sections.
When is Larch Valley typically snow-free?
Larch Valley, one of the most famous high-altitude hikes for its autumn colours, sits at a high elevation. It usually becomes fully accessible and largely snow-free by late July or early August. Attempting it earlier often involves navigating significant and potentially hazardous snow patches.