
That gondola ride to the top of an Alberta mountain makes the alpine incredibly accessible, but it also creates a dangerous illusion of safety. The core mistake is packing for the weather at the base, not for the harsh reality at the summit. This guide reframes your packing list as a strategic survival system, focusing on the science behind managing thermal shock, altitude, and exposure to ensure your stunning day hike doesn’t turn into a life-threatening emergency.
You step out of your car at the base of the gondola. It’s a perfect 20°C Alberta morning, the sun is shining, and the summit looks magnificent. You’re planning to ride up and enjoy a scenic walk back down. It feels simple, almost casual. This is the first and most dangerous trap in the Canadian Rockies: alpine deception. The ease of access lulls you into a false sense of security, making you forget that you are entering an environment where conditions can, and will, change with brutal speed. A 25-degree temperature drop isn’t an anomaly; it’s a predictable event you must prepare for.
The standard advice to “dress in layers” is a start, but it’s dangerously incomplete. It doesn’t explain the physics of why you get sunburnt in minutes at altitude, the biomechanics of why your knees fail on a “simple” descent, or the physiology of why you can’t catch your breath on a trail labelled “easy.” It doesn’t teach you to see your gear not as a collection of items, but as an integrated system for managing metabolic heat and moisture—the two factors that dictate whether you end the day with a smile or with symptoms of hypothermia.
But what if you could approach packing with the mindset of a mountain professional? The key isn’t to bring more gear, but to bring the right gear and understand precisely how and when to use it. This guide moves beyond the checklist. We will deconstruct the specific, often counter-intuitive, environmental challenges you will face on a high-elevation day hike in Alberta and provide a strategic framework for mastering them. From the science of base layers to the critical moment you must turn back in a storm, you will learn to think, prepare, and act like a seasoned mountaineer.
This article breaks down the essential knowledge you need, covering the unique environmental threats of the Albertan Rockies and the specific gear and strategies required to counter them. Follow along to build a packing system that ensures your safety and enjoyment from the sunny base to the freezing summit.
Summary: A Strategic Guide to Alberta’s Mountain Weather
- Why Do You Get Sunburnt in 15 Minutes at Sunshine Village?
- Are You Safe from Avalanches on Marked Winter Trails in November?
- What to Do When a Lightning Storm Hits While You Are on a Ridge?
- Why Can’t I Catch My Breath on a “Easy” Hike at Lake Louise?
- Poles or No Poles: Do You Really Need Them for Banff Day Hikes?
- Merino or Synthetic: What Base Layer Saves You from Hypothermia in August?
- The Notch in a Storm: When Should You Turn Back on the Skyline?
- Via Ferrata or Whitewater Rafting: Which Adrenaline Rush Fits Your Budget?
Why Do You Get Sunburnt in 15 Minutes at Sunshine Village?
The brilliant, cool air at high elevation is deceptive. While it may feel fresh, the atmosphere is thinner, offering significantly less protection from the sun’s ultraviolet rays. For every 1,000 meters you ascend, UV radiation intensity increases by 10-12%. At a destination like Sunshine Village or the Lake Agnes Teahouse, sitting above 2,100 meters, you’re being exposed to over 20% more intense UV than in Calgary. This effect is amplified by snow, which can reflect up to 80% of UV rays, essentially hitting you with a double dose of radiation from above and below.
This is why a seemingly mild day can result in a severe sunburn in a matter of minutes. It has nothing to do with the ambient temperature. Your skin is reacting to a high-energy assault that you cannot feel until the damage is done. Relying on a cool breeze as an indicator of sun safety is a critical error in the alpine environment. As the experience at Lake Agnes Teahouse demonstrates, hikers spending extended time above 2,000m must prioritize sun protection. Local wisdom is clear: it’s far better to apply a layer of sunscreen to enjoy every day of their visit instead of nursing a burn from inside their hotel room.
Therefore, your sun protection strategy must be non-negotiable and multi-faceted. It involves not just sunscreen, but physical barriers. A wide-brimmed hat, UV-rated sunglasses, and even a long-sleeved sun shirt on a 20°C day are not signs of over-preparation; they are essential tools for managing a serious environmental threat. Reapplication of sunscreen every two hours is critical, especially as you sweat during your descent.
Are You Safe from Avalanches on Marked Winter Trails in November?
The word “trail” implies a degree of safety, a designated path free from major hazards. In the shoulder seasons of the Albertan Rockies, particularly from October to December, this assumption can be fatal. A “marked trail” simply indicates a route; it is not a guarantee of safety from avalanches. Early season snowfall creates a notoriously unstable snowpack. A warm afternoon or the weight of a single hiker can be enough to trigger a slide on a slope that looks entirely benign.
Many popular and well-marked trails in areas like Banff and Kananaskis cross through or below avalanche terrain. These are known as “avi paths,” and even a small slide can have enough force to bury a person. The danger lies in complacency. Hikers see a clear path and other people, and their situational awareness drops. As real-time community reports from hikers in Alberta show, conditions are dynamic and must be checked daily. A trail report stating ‘The avalanche risk was low as of today, so it was perfect!’ highlights the right mindset: risk is assessed for *that specific day*, not assumed based on a trail marker.
Before heading out on any trail with snow cover in November, consulting the latest Avalanche Canada forecast for your specific region is mandatory. Understand that “Low” risk does not mean “No” risk. It’s crucial to be able to identify avalanche terrain—which includes not just the major slopes, but also the “runout zones” at the bottom where debris collects. If your planned route crosses these areas, you must carry avalanche safety gear (transceiver, shovel, probe) and know how to use it. If you don’t have this training, the only safe decision is to choose a different trail confined to dense forest and flat terrain.
What to Do When a Lightning Storm Hits While You Are on a Ridge?
You’ve reached the summit, and the view is spectacular. But in the distance, dark clouds are building with alarming speed. On an exposed ridgeline, you are the tallest object around, making you a prime target for a lightning strike. This is one of the most acute and time-sensitive dangers in the mountains. Your “exposure clock” has started ticking, and your only goal is to get off the high ground as quickly and safely as possible.
Panic is your enemy; a calm, immediate, and decisive response is your only tool. Do not wait for the first flash or thunderclap. By then, you are already in the danger zone. The moment you see a storm building, your descent must begin. The protocol for evacuating an exposed area like Ha Ling Peak near Canmore is simple: move down. Don’t seek shelter under a solitary tree or a small rock outcropping, as these can attract strikes. Your aim is to get below the treeline and into a large, uniform stand of trees if possible. If you are caught completely in the open, find a low-lying spot (a ditch or depression), make yourself as small as possible by crouching on the balls of your feet, and minimize your contact with the ground.
This is where having the right gear becomes critical. A good rain jacket is essential, not just for rain, but for protection against the wind and sudden temperature drop that accompanies a storm. As the advice for Ha Ling Peak hikers notes, essentials including a jacket, phone, bear spray, and water are the bare minimum. Trekking poles, often seen as optional, become invaluable for a rapid but stable descent on rocky or slippery terrain.

As the image above illustrates, the goal is controlled urgency. You must move efficiently away from the high, exposed terrain toward the relative safety of lower elevations. The time for photos is over; the time for decisive action has begun. Disperse from your group to minimize the risk of multiple injuries from a single strike and continue moving downward until you are well clear of the ridgeline and the storm has passed.
Why Can’t I Catch My Breath on a “Easy” Hike at Lake Louise?
You’re on the Plain of Six Glaciers trail, rated as a moderate hike. The grade isn’t extreme, yet you’re gasping for air and your heart is pounding. This isn’t a sign of poor fitness; it’s a textbook physiological response to altitude. The parking lot at Lake Louise sits at a significant elevation, and the air here contains less oxygen per breath than you’re used to. In fact, Lake Louise sits at approximately 1,750 meters elevation, which is high enough to affect anyone not properly acclimatized.
Your body is working overtime to extract the oxygen it needs, leading to shortness of breath, a rapid pulse, and increased fatigue. An “easy” 5 km hike at sea level feels dramatically different than the same distance starting at this altitude. The popular Plain of Six Glaciers trail, for example, is a 9 km return with 370 m elevation gain. While these stats seem manageable, the high starting elevation is the hidden challenge that turns a moderate walk into a strenuous effort for many visitors. This is the reality of acclimatization, or the lack thereof.
The only cure for this is time. Your body needs several days to adapt by producing more red blood cells to carry oxygen more efficiently. A proper strategy for a trip to the Rockies involves starting with lower-elevation activities. Spend your first day or two walking around the Banff townsite (1,400m) or tackling a small objective like Tunnel Mountain before attempting the classic hikes around Lake Louise. Aggressively hydrating (water, not alcohol or caffeine) and maintaining a slow, steady pace are also crucial. Listen to your body: if you feel dizzy, nauseous, or develop a headache, it’s a sign you are pushing too hard, too high, too soon. Descend to a lower elevation and rest.
Poles or No Poles: Do You Really Need Them for Banff Day Hikes?
Trekking poles often seem like an accessory for serious mountaineers, but for the gondola-assisted day hiker, they are one of the most valuable yet underrated pieces of safety equipment. Their primary benefit isn’t for the ascent; it’s for the descent. Your plan to walk down means subjecting your knees and quadriceps to thousands of repetitive, high-impact steps. Poles transform this punishing process by distributing the load across your entire body.
Consider the descent from a popular objective like Ha Ling Peak. After a steep ascent, you are faced with a long downhill slog on loose rock, or “scree.” This is where poles become indispensable. They act as two extra points of contact, dramatically improving your balance and reducing the strain on your joints. Each time you plant a pole, you are transferring a portion of your body weight and the impact of the step from your knees to your arms and shoulders. This energy-saving effect is cumulative. Over a multi-hour descent, it can be the difference between finishing with tired-but-happy legs and experiencing debilitating knee pain that could lead to a stumble or fall.
This isn’t just about comfort; it’s about endurance and safety. By saving energy and protecting your joints, you maintain better form and concentration, reducing your risk of injury on uneven terrain. As the official advice from local experts confirms, this is a tool that fundamentally changes the hiking experience. In the words of Banff & Lake Louise Tourism:
Hiking poles take the strain off your knees and gets your upper body involved in the action. Once you’ve tried them you may never leave them behind again!
– Banff & Lake Louise Tourism, Official Banff National Park Hiking Guide
For the hiker taking the gondola up, poles are your insurance policy for the walk down. They are a lightweight, high-impact tool that makes the descent safer, faster, and far more enjoyable.
Merino or Synthetic: What Base Layer Saves You from Hypothermia in August?
It’s a warm August day, but you’ve just been caught in a brief, cold rain shower on the trail. You’re wet, the wind picks up, and suddenly you’re shivering uncontrollably. This is the onset of hypothermia, and it can happen even in summer. Your life in this scenario may depend on the shirt you’re wearing directly against your skin: your base layer. Its one and only job is moisture management, and choosing the right material is not a matter of comfort, but of survival.
Your enemy is not the cold, but water—both from rain and your own sweat. Cotton is the absolute worst choice; it absorbs moisture, sticks to your skin, and rapidly sucks away body heat, a phenomenon known as conductive heat loss. The choice for mountain safety comes down to two materials: merino wool and modern synthetics (like polyester or polypropylene). While both are designed to wick moisture away from your skin, they behave very differently, especially when damp.
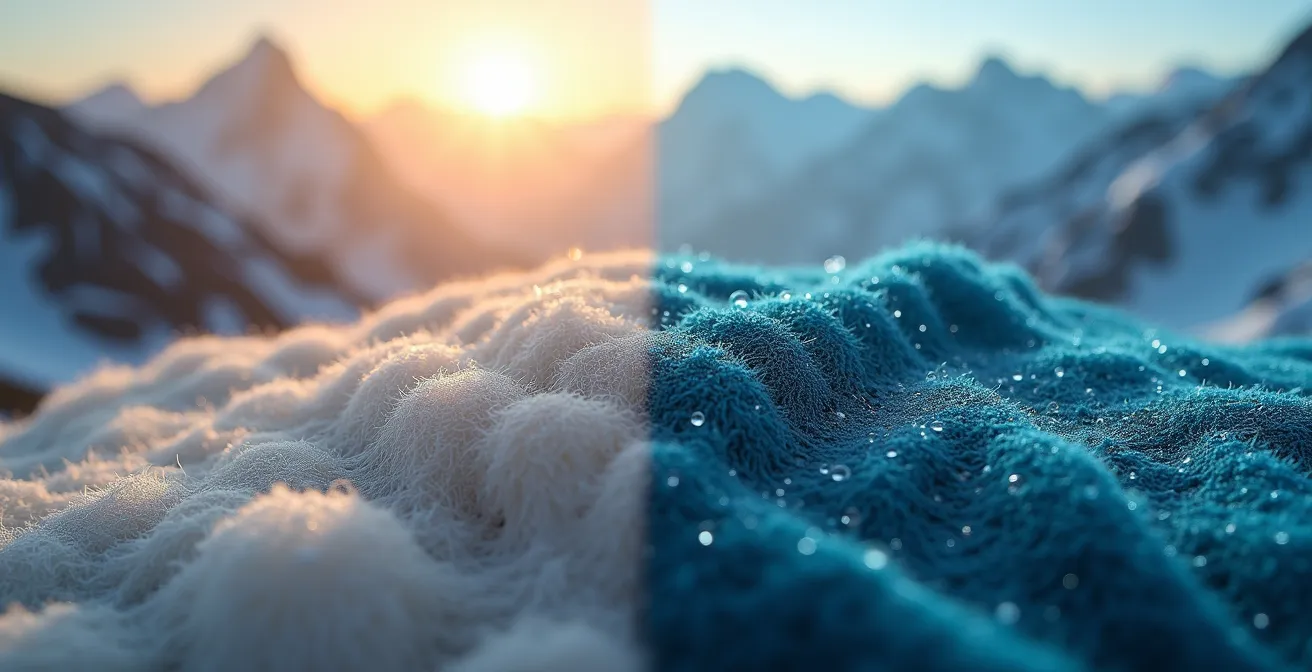
As the textures above suggest, these fabrics are engineered differently. Synthetic fabrics are champions of wicking and drying speed. They actively pull sweat to the surface and dry in a flash, making them ideal for high-output, continuous effort where you’re sweating constantly. Their downside is that they offer very little insulation once wet and tend to develop odor quickly. Merino wool, a natural fiber, works differently. It can absorb a significant amount of moisture vapour before it even feels wet, and most importantly, it retains its insulating properties when damp. This makes it a superior choice for the stop-and-go nature of most day hikes, where you sweat on the uphill and then cool down rapidly at a viewpoint.
The choice between them depends on the specific conditions and your activity level, but for the typical day hiker facing unpredictable weather, merino’s ability to keep you warm even when wet is a critical safety feature.
This table from a Banff packing guide provides a clear comparison to help you decide which material is right for your hiking style.
| Feature | Merino Wool | Synthetic |
|---|---|---|
| Insulation When Wet | Excellent | Poor |
| Drying Speed | Slow | Very Fast |
| Odor Resistance | Excellent | Poor |
| Temperature Regulation | Excellent | Good |
| Best Use Case | Stop-and-go hiking | High-output continuous effort |
The Notch in a Storm: When Should You Turn Back on the Skyline?
The Skyline Trail in Jasper is one of Alberta’s premier hikes, but its most infamous section, “The Notch,” is a stark reminder of the power of alpine weather. It’s a high, exposed col that represents a point of no return for many. Being caught here in a storm is a life-threatening situation. This scenario brings together every element of mountain preparedness: weather forecasting, timing, gear, and the most difficult skill of all—the decision to turn back.
Turning back is not a sign of failure; it is a sign of expert judgment. The summit will still be there tomorrow. The question is, will you? The decision to push on or retreat from a high point like The Notch cannot be based on emotion or “summit fever.” It must be a cold, calculated assessment based on a pre-defined set of criteria. You must establish your own “Go/No-Go” rules before you even leave the trailhead and have the discipline to stick to them.
This is not a decision to be made in the moment. It is a plan. Your checklist should include non-negotiable turnaround triggers. Is the wind forecast to exceed 50 km/h at altitude? That’s a no-go. Is the cloud ceiling obscuring your view of the route ahead? No-go. Have you failed to reach a key landmark by a pre-determined time? You turn back, no questions asked. The variable weather in Alberta’s backcountry means that even a good forecast can be wrong. You must constantly observe the changing conditions and be ready to enact your turnaround plan.
Your Go/No-Go Decision Checklist for Exposed Alpine Terrain
- Assess Forecast: Check specific alpine wind and precipitation forecasts. Are there any watches or warnings for your elevation?
- Set a Hard Turnaround Time: Determine the absolute latest time you must turn back to be off the mountain before dark or before afternoon weather typically moves in. Stick to it.
- Monitor Real-Time Conditions: Are the clouds building faster than expected? Is the temperature dropping more rapidly? Is the wind stronger than forecast? Your observations trump the forecast.
- Evaluate Group Condition: How is the weakest member of your party doing? Are they cold, tired, or slow? Your group’s pace is dictated by its slowest member.
- Confirm Escape Routes: Do you know the location of the nearest emergency shelter or the fastest/safest descent route from your current position?
Key Takeaways
- The ease of a gondola ride creates a dangerous complacency; you are entering a serious alpine environment.
- Your “packing list” should be viewed as an integrated survival system designed to manage thermal shock and moisture.
- Altitude, UV exposure, and weather are not separate issues; they are interconnected threats that must be managed simultaneously.
Via Ferrata or Whitewater Rafting: Which Adrenaline Rush Fits Your Budget?
After mastering the art of self-guided preparation, you might be looking for a different kind of challenge—one where the logistics and safety systems are managed by professionals. The Albertan Rockies offer world-class guided adventures that provide a major adrenaline rush within a controlled environment. Two of the most popular are the Via Ferrata at Mt. Norquay and whitewater rafting on the Kicking Horse or Kananaskis Rivers. Choosing between them often comes down to budget, timing, and the type of physical challenge you’re seeking.
A Via Ferrata (“Iron Way”) is a protected climbing route using steel cables, rungs, and ladders fixed to the rock. It gives you the exposure and thrill of rock climbing without requiring technical skill. Rafting, on the other hand, is a team-based battle against the power of a river. Both offer incredible scenery and a significant dose of adrenaline, but they tax your body and your wallet in different ways. The Via Ferrata is highly weather-dependent and places a heavy demand on your upper body and nerve. Rafting can often run in the rain and is a full-body workout, but without the lingering fatigue from altitude.
As Travel Alberta experts suggest, “A guide can make your hiking more of an experience and less of an exercise in planning and logistics.” This holds true for these adrenaline activities as well. The price you pay includes not just the experience, but the expertise, equipment, and safety oversight that allow you to push your limits with confidence. When choosing, consider not just the sticker price, but the overall value and how the activity fits into your trip.
This comparative analysis breaks down the key factors to help you decide which guided adventure is the best fit for your trip to the Rockies.
| Factor | Via Ferrata (Mt. Norquay) | Whitewater Rafting |
|---|---|---|
| Typical Cost Range | $150-250 CAD | $100-200 CAD |
| Duration | 2-4 hours | 3-6 hours |
| Weather Dependency | High (cancelled for storms) | Low (runs in rain) |
| Physical Demand | Upper body intensive | Full body |
| Elevation Impact | Affects next day hiking | No altitude fatigue |
| Best Season | July-September | May-June (high water) |
Your adventure in the Canadian Rockies begins not at the trailhead, but with the preparation you do today. By adopting a strategic mindset and respecting the power of the mountains, you earn the right to safely enjoy some of the most spectacular landscapes on Earth. Plan smart, stay safe, and make every summit view a true reward.