
In summary:
- Treat the drive as a logistical mission, not a simple checklist, by applying strict time budgets to each stop.
- Drive from South to North (Banff/Lake Louise to Jasper) for safer, more efficient pullouts on your right-hand side.
- Mitigate key risks by starting with a full tank of gas from Canmore/Banff and having a non-cellular communication plan.
- Make informed “experience ROI” decisions, especially at the Columbia Icefield, by comparing cost, time, and value.
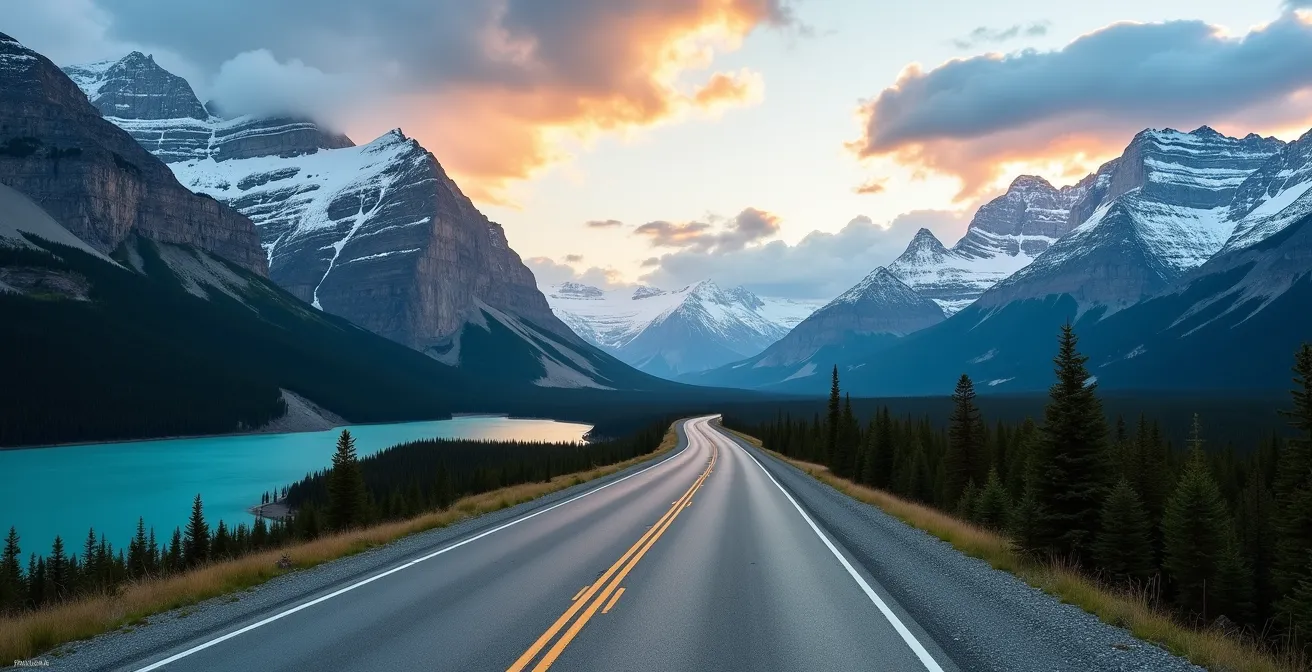
The drive from Banff to Jasper along the Icefields Parkway is consistently ranked among the world’s most beautiful road trips. The sheer number of glaciers, turquoise lakes, and thundering waterfalls can feel overwhelming, especially when you only have a single day. Many travelers start with a simple list of “must-see” spots, only to find themselves rushing, missing out, or stuck in a crowd of tour buses, turning a dream drive into a stressful race against the clock. You need more than a list; you need a strategy.
The common advice is to “start early,” but that’s not enough. A successful one-day traverse of this epic 232-kilometre highway isn’t about seeing everything—it’s about seeing the *right things* in the *right way*. The secret isn’t in rushing from one viewpoint to the next, but in approaching the day as a logistical operation. This involves strategic time budgeting, understanding traffic flow, mitigating risks like fuel and communication blackouts, and making smart trade-offs to maximize the return on your most valuable asset: your time.
This guide abandons the simple checklist in favour of a strategic framework. We will analyze the critical decisions you’ll face at each major juncture, from the efficiency of your driving direction to the cost-benefit of major tours. By the end, you’ll have a logistical blueprint to conquer the Icefields Parkway, ensuring a day of awe-inspiring moments, not logistical headaches. Remember that access to the Icefields Parkway requires a Parks Canada Discovery Pass, which should be purchased online in advance or at the park gates.
To help you navigate this journey, we’ve broken down the key strategic decisions you’ll need to make along the way. This structured approach will transform your trip from a frantic dash into a well-executed expedition.
Contents: A Strategic Itinerary for the Icefields Parkway
- The Hike to the Wolf Head: Is the Viewpoint Worth the Steep Walk?
- Waterfalls on the Roadside: Where is the Best Place to Stop Safely?
- Saskatchewan Crossing: Why is Gas 30 Cents More Expensive Here?
- North to South or South to North: Which Direction Offers Better Views?
- No Service for 230km: How to Communicate if You Break Down?
- How Much Has the Toe of the Glacier Receded Since Your Last Visit?
- Why Is the Athabasca Glacier 1.5km Further Away Than in 1844?
- Ice Explorer vs Guided Hike: Which Columbia Icefield Tour is Worth $100+?
The Hike to the Wolf Head: Is the Viewpoint Worth the Steep Walk?
Peyto Lake, shaped uncannily like a wolf’s head, is one of the most iconic and photographed sights in the Canadian Rockies. For years, the main deterrent for time-crunched travelers was the steep, often crowded path to the viewpoint. The critical question was always whether the time investment for the hike justified the reward. However, a significant infrastructure upgrade has changed this calculation entirely. In 2021, Parks Canada completed a major project that transformed the access route, creating a wider, paved path that is far more manageable.
The “steep walk” is now a much more predictable part of your time budget. The new trail to the upper viewpoint is a 0.7 km paved trail with a 70-meter elevation gain taking about 15 minutes for most visitors. This investment is minimal for one of the most breathtaking views in the world. The new platform offers a stunning panorama of the vibrant turquoise water, fed directly by glacial silt from the Peyto Glacier.
For a strategic visit, allocate a total stop time of 45-60 minutes. This includes parking (which has been improved with separate lots for cars and buses), the 15-minute walk up, 15-20 minutes for photos at the main platform, and the walk back down. To mitigate the “logistical bottleneck” of crowds, aim to arrive before 9 AM or after 6 PM, outside the peak tour bus window. The view is absolutely worth the effort, and thanks to recent improvements, the time and energy cost is now a highly efficient part of your one-day plan.
Waterfalls on the Roadside: Where is the Best Place to Stop Safely?
The Icefields Parkway is dotted with countless waterfalls, creating a tempting but potentially hazardous situation for drivers. The urge to pull over for a quick photo is strong, but unplanned stops on the shoulder are a significant safety risk and can result in hefty fines. A strategic approach involves identifying the major, worthwhile waterfalls and understanding how to access them safely using designated pullouts.
The two most significant waterfall stops are Sunwapta Falls and Athabasca Falls, both located closer to the Jasper end of the parkway. Choosing between them, or deciding how to visit both, is a key logistical decision. Athabasca Falls is renowned for its sheer power and the canyon it has carved, while Sunwapta is celebrated for its picturesque setting with a distinctive island of trees just above the drop. To make an informed choice, consider the following comparison based on time of day and crowd levels.
This table helps you strategically plan which waterfall to prioritize based on your schedule and tolerance for crowds. For a one-day trip heading north, Sunwapta Falls is an ideal morning stop, while Athabasca Falls is better experienced in the late afternoon as you approach Jasper.
| Factor | Athabasca Falls | Sunwapta Falls |
|---|---|---|
| Distance from Jasper | 30 km south | 55 km south |
| Best Photography Time | Late afternoon (3-6 PM) | Morning (before 10 AM) |
| Parking Difficulty | High (tour buses frequent) | Moderate to Low |
| Trail Length | Multiple viewpoints, 30 min total | Short 5-min walk to upper falls |
| Crowd Level | Very High midday | Moderate throughout day |
| Power/Drama | Most powerful in Rockies | 18m drop, scenic backdrop |
Your Action Plan: Safe Pullout Protocol on the Parkway
- Look for official Parks Canada signage marking legitimate viewpoints before you even consider slowing down.
- Verify the presence of dedicated deceleration and acceleration lanes; never brake abruptly on the main highway.
- Only park in designated, marked areas with proper safety barriers between you and the highway.
- Avoid all unmarked shoulder stops; fines for illegal parking start at a steep $287 CAD.
- Prioritize established, large pullouts for quick scenic stops, such as those at Herbert Lake, Bow Lake, and the Crowfoot Glacier viewpoint.
Saskatchewan Crossing: Why is Gas 30 Cents More Expensive Here?
Saskatchewan River Crossing is the only place to get fuel, food, and basic services along the entire 232-km stretch of the Icefields Parkway. This monopoly on services creates a significant logistical question for every driver: to stop or not to stop? The gas station here is notorious for its high prices, with travelers consistently reporting they charge a 30-40 cent per liter premium above prices in Banff or Jasper. This isn’t a minor markup; it can add $20-$30 to the cost of filling up a standard SUV.
The high price is a simple matter of supply and demand, coupled with the extreme cost of transporting fuel to such a remote, off-grid location. The facility must generate its own power and manage all its services independently. While the price is high, for an unprepared driver with the fuel light on, it’s a non-negotiable necessity. However, for the strategic traveler, it’s an avoidable expense. The key is to start your journey with a full tank of gas from Canmore, Banff, or Jasper, where prices are competitive.
Most modern rental vehicles, even SUVs, have a driving range that comfortably exceeds the length of the parkway. A full tank is your insurance policy against the “fuel anxiety” that can plague drivers as they pass the halfway point. To determine if your vehicle can make it, consult this simple guide.
This data clearly shows that with proper planning, almost any standard rental vehicle can complete the journey without needing to pay the premium at The Crossing. Filling up in town is the single most effective cost-saving measure you can take on this drive.
| Vehicle Type | Fuel Consumption (L/100km) | Tank Size (L) | Range on Full Tank (km) | Can Skip Saskatchewan Crossing? |
|---|---|---|---|---|
| Compact Sedan | 7.5 | 50 | 667 | Yes – easily |
| Mid-size SUV | 10.5 | 65 | 619 | Yes – with margin |
| Full-size SUV | 13.0 | 85 | 654 | Yes – if filled in Banff/Canmore |
| Minivan | 11.0 | 75 | 682 | Yes – comfortably |
North to South or South to North: Which Direction Offers Better Views?
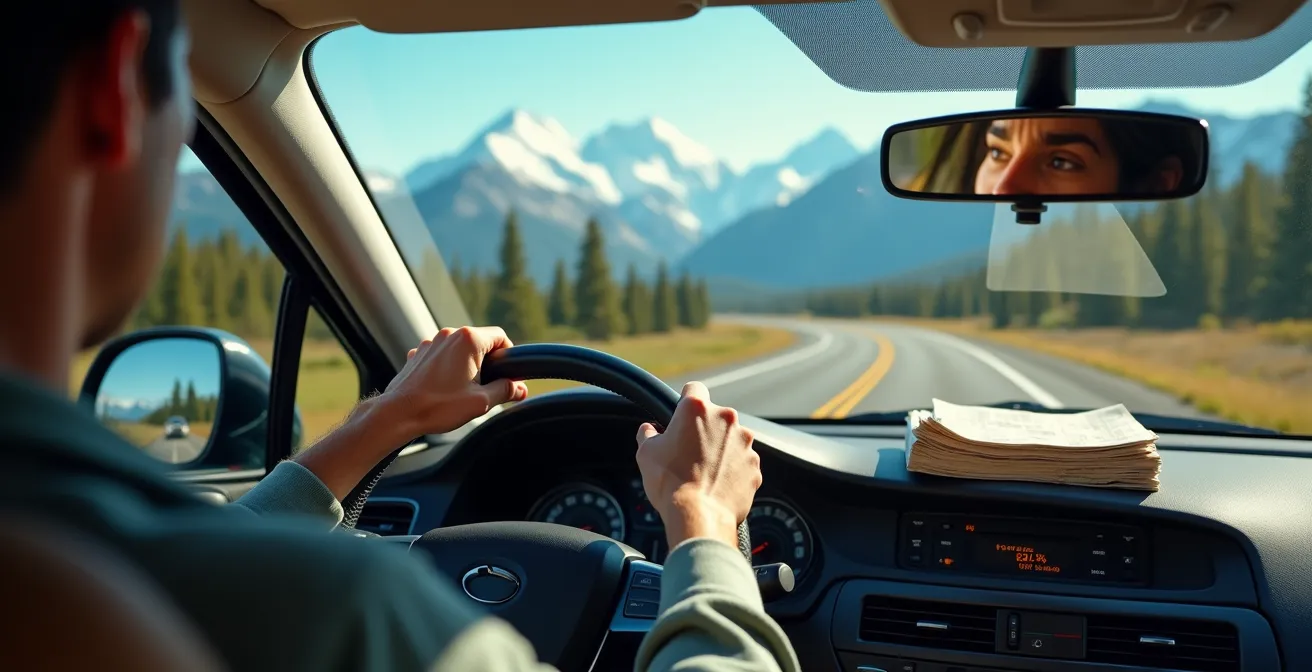
One of the most fundamental strategic decisions is which direction to drive the parkway. While the views are spectacular both ways, the experience—and your efficiency—can differ significantly. For a one-day trip focused on maximizing stops and minimizing logistical friction, the consensus among seasoned drivers and photographers points to one clear winner: driving from South to North (from Lake Louise towards Jasper).
The primary reason is logistical. The vast majority of major viewpoints and pullouts—including Herbert Lake, Bow Lake, Peyto Lake, and the Weeping Wall—are located on the east side of the highway. When driving north, these are all on your right-hand side. This allows for easy, safe entry and exit from pullouts without ever needing to make a dangerous left turn across oncoming traffic. In a single day, eliminating these turns can save a surprising amount of time and significantly reduce stress.
From a photographic perspective, the directional choice also matters. Professional photographers note that when driving north from Lake Louise in the morning, the early light beautifully illuminates key subjects like Crowfoot Glacier and Mount Chephren. The drive seems to build in grandeur, with many reporting that the views “kept getting better and better heading north.” Conversely, the North-to-South direction offers better light in the Athabasca Valley for evening or sunset photography, making it a better choice for a return journey or a multi-day trip, but less optimal for a packed one-day itinerary starting in the morning.
No Service for 230km: How to Communicate if You Break Down?
The Icefields Parkway’s magnificent isolation is its main appeal, but it’s also its greatest risk. It is critical to understand that for the majority of the drive, you will have absolutely no cell service. Parks Canada officially confirms there is no cell coverage on the 232 km Icefields Parkway between Lake Louise and Jasper. This isn’t spotty service; it’s a complete communication blackout. A flat tire or mechanical issue here requires a different kind of contingency plan.
Your primary tool for emergency communication is other people. The parkway is well-traveled during daylight hours. If you have an issue, pull over safely, make your vehicle visible, and flag down a passing car. However, there are also a few technological and procedural backstops. The most important is knowing the location of the few emergency satellite phones available to the public. These are your direct line to help.
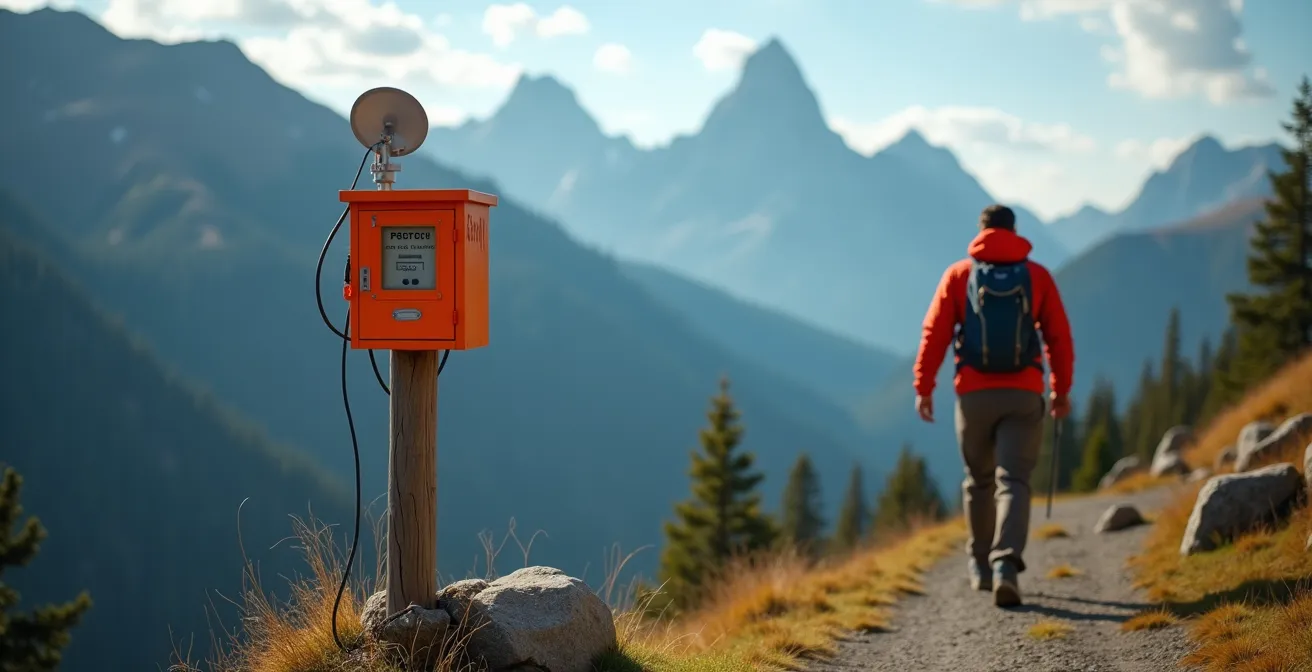
Your preparation before you leave is the most important safety measure. Ensure your vehicle is in good working order, your spare tire is properly inflated, and you have basic supplies. Downloading offline maps (using apps like Google Maps’ offline feature, Gaia GPS, or AllTrails) is non-negotiable. For those seeking ultimate peace of mind, renting a satellite messenger device like a Garmin inReach, which allows for two-way texting and an SOS function from anywhere, is a worthwhile investment.
Emergency Communication Protocol:
- Locate the public satellite phones at the Columbia Icefield Centre, Saskatchewan River Crossing, and the Parker Ridge Trailhead.
- If you must flag down a vehicle, use the universal distress signal of waving both arms over your head.
- Know your location by noting the nearest kilometer marker post on the side of the road.
- Provide a driver who stops with your vehicle’s make, model, color, and license plate, and ask them to contact Parks Canada wardens upon reaching the next town.
How much Has the Toe of the Glacier Receded Since Your Last Visit?
The Athabasca Glacier is the most visited glacier in North America, but it’s a dynamic, shrinking landmark. For repeat visitors, the change is often visibly shocking. For first-timers, understanding the scale of its retreat provides a powerful, tangible connection to the broader issue of climate change. The glacier’s retreat is not an abstract concept; it’s a measurable reality you can witness on the ground.
Glaciologists have been tracking its movement for decades, and the data paints a stark picture. While rates vary, recent measurements show the toe of the Athabasca Glacier is retreating at an average rate of 5 meters per year. Over a decade, that’s 50 meters—half the length of a Canadian football field. This rapid melt means that the glacier you see today is noticeably smaller than it was just a few years ago, and dramatically different from a generation ago.
The most profound way to experience this change is by walking the “Toe of the Glacier” trail. Parks Canada has ingeniously installed a series of dated markers along the path, showing the historical location of the glacier’s edge. You can physically stand at the spot where the ice reached in 1982, 1950, or even 1908. This short walk becomes a journey through time, allowing you to cover nearly 180 years of glacial history. The distance between these markers visually communicates the accelerating pace of ice loss, transforming a simple hike into a powerful environmental lesson.
Why Is the Athabasca Glacier 1.5km Further Away Than in 1844?
As you walk towards the Athabasca Glacier, one of the first and most striking markers you’ll encounter is the one for 1844. It sits a staggering 1.5 kilometers from the current ice front, prompting an obvious question: what happened? This marker doesn’t just represent a point in time; it signifies the end of an era. The glacier’s retreat is a story of both natural cycles and modern acceleration.
The vast distance is explained by a global climatic event known as the Little Ice Age, a period of global cooling that lasted for several centuries and ended in the mid-19th century. The 1844 marker shows the glacier’s maximum point of advance at the very end of this cold period. As a Parks Canada Interpretive Guide at the Columbia Icefield Discovery Centre explains, this context is crucial for understanding the full story.
The 1844 marker represents the glacier’s maximum extent at the end of the Little Ice Age, providing crucial context that the retreat is an acceleration of a natural process due to modern climate change.
– Parks Canada Interpretive Guide, Columbia Icefield Discovery Centre
So, while the glacier was already in a natural state of retreat after 1844, the pace of that retreat has increased dramatically in the industrial era. You can become a geological detective and see the evidence of this history written on the landscape itself. By learning to “read” the valley, you can identify the scars left by the ice.
- Lateral Moraines: Look for the high ridges of rock and debris running parallel to the valley walls. These are the “banks” of the ancient, much larger glacier.
- Glacial Polish: Notice how some of the exposed bedrock at the valley bottom is smooth and almost polished. This was caused by the immense weight and slow scrape of the ice and rocks embedded within it.
- Vegetation Patterns: Observe how the size and type of trees change as you get closer to the glacier. The areas near the 1844 marker have mature forests, while the land uncovered in the 20th century has only small shrubs and lichen.
Key Takeaways
- Strategic planning is more valuable than a simple checklist; focus on time budgeting and risk mitigation.
- The South-to-North driving direction offers superior logistical efficiency and safety for a one-day trip.
- Key decisions at Saskatchewan Crossing (fuel) and Columbia Icefield (tours) have the biggest impact on your budget and schedule.
Ice Explorer vs Guided Hike: Which Columbia Icefield Tour is Worth $100+?
The climax of the Icefields Parkway is the Columbia Icefield, and the decision of how to experience the Athabasca Glacier is your most significant “Experience ROI” calculation of the day. The main paid options—the Ice Explorer vehicle tour and a guided Ice Walk—both cost well over $100 per person. For a family, this is a major investment of both time and money. Deciding which, if any, is “worth it” depends entirely on your goals, physical ability, and budget.
The Ice Explorer is a massive, all-terrain bus that drives you onto a designated, flattened area of the glacier where you have about 15-20 minutes to walk around. It’s fast, accessible for all ages and fitness levels, and provides the “I stood on a glacier” photo op. The Guided Ice Walk, in contrast, is a three-hour commitment where you hike with a certified guide onto the glacier itself, exploring ice formations and learning about glaciology. It’s a deeper, more immersive, and educational experience. There’s also the free option: the “Toe of the Glacier” trail, which takes you to a viewpoint near the glacier’s edge but does not allow you on the ice. Booking any paid tour during Alberta statutory holidays may require booking 3-4 weeks in advance due to high demand.
To make a purely logistical decision, breaking down the cost per minute spent on the actual ice is incredibly revealing. This analysis highlights the true value proposition of each experience.
| Experience | Cost (CAD) | Duration | Time on Ice | Cost per Minute on Ice | Best For |
|---|---|---|---|---|---|
| Ice Explorer | $125 | 80 minutes | 15 minutes | $8.33/min | Families, quick photo ops |
| Guided Ice Walk | $140 | 3 hours | 90 minutes | $1.56/min | Active adults, deeper experience |
| Toe of Glacier Trail (Free) | $0 | 60 minutes | 0 (view only) | $0 | Budget travelers, self-guided |
| Glacier Skywalk Add-on | $35 extra | 30 minutes | 0 | N/A | Thrill seekers, photographers |
The data is clear: while the Ice Walk has a higher ticket price, its cost-per-minute on the ice is over five times lower than the Ice Explorer. It offers a far greater return on investment for those seeking a genuine glacier experience. The Ice Explorer is a logistical trade-off: you pay a premium for speed and accessibility. The best choice depends on your personal trip strategy.
By applying this strategic, logistical framework to your journey, you can transform an overwhelming list of sights into a perfectly executed, awe-inspiring day. Plan your fuel, pre-select your stops based on time of day, and make informed decisions on how you invest your time and money. This is how you truly conquer the Icefields Parkway.